It’s fall, and here in NYC the mercury is finally sort of starting to agree with that statement. Not that I’m complaining about the lack of brisk coolness (much), since I’m dreading winter, but fall is my favorite season. No more blazing hot sweat fests! Boots! Jackets! Cute Scarves! Not freezing to death!
And with all of that comes my love and my nemesis … the pumpkin spice latte. I have a seriously love/hate (mostly hate) relationship with the mermaid coffee shop. Their coffee on its own sucks. It’s bitter and burnt and undrinkable without a metric ton of sugar and other fillers, and that’s just no good and not what I desire to be putting into my body. But … they’re everywhere. And they have pumpkin. And the pumpkin. Lucky/not lucky for me, they have never made a “skinny” sugar-free version of the syrup they use & the sugar content of their full fat/sugared coffees makes me sick, so for the last few years I’ve limited my consumption drastically.
This home made version, I’m happy to say, is tasty. Really tasty. I’m still working on the sweet ratio – for me, 1 tsp. of maple syrup is a bit too sweet — I may drop it completely from subsequent batches — but it is solidly good. And it has a vegetable in it, so score there.
For my inaugural run, the version in the picture, I used Earl Grey tea as the base – mostly because I was too lazy to grind coffee. Feel free to use coffee instead. 🙂 The amounts of tea to coconut is also scaled to fit my tea container, which I think is 12 ounces.
Pumpkin Spice Latte (paleo)
1 1/4 cup brewed Earl Grey tea
1/2 cup coconut milk
1.5 Tbsp. canned 100% pumpkin
1 tsp. 100% Maple syrup
1 tsp. pumpkin pie spice (equal parts cinnamon, ginger, allspice & nutmeg)
1 tsp. pure vanilla extract
Brew the tea. While the tea is steeping, heat the coconut milk + all other ingredients in a small pan until just bubbling, whisking to combine fully.
Combine the brewed tea with the milky mixture and go to town. If you’re looking for a fancier drink, top with whipped cream and extra grated nutmeg. I drink all hot beverages out of a travel mug (sippy cup for grownups – don’t let me fool you; that pretty latte in the picture went right into the mug), so whipped cream is a no-go. But, were I having company similarly obsessed with pumpkin, whipped cream would not only be a go, but a necessity.
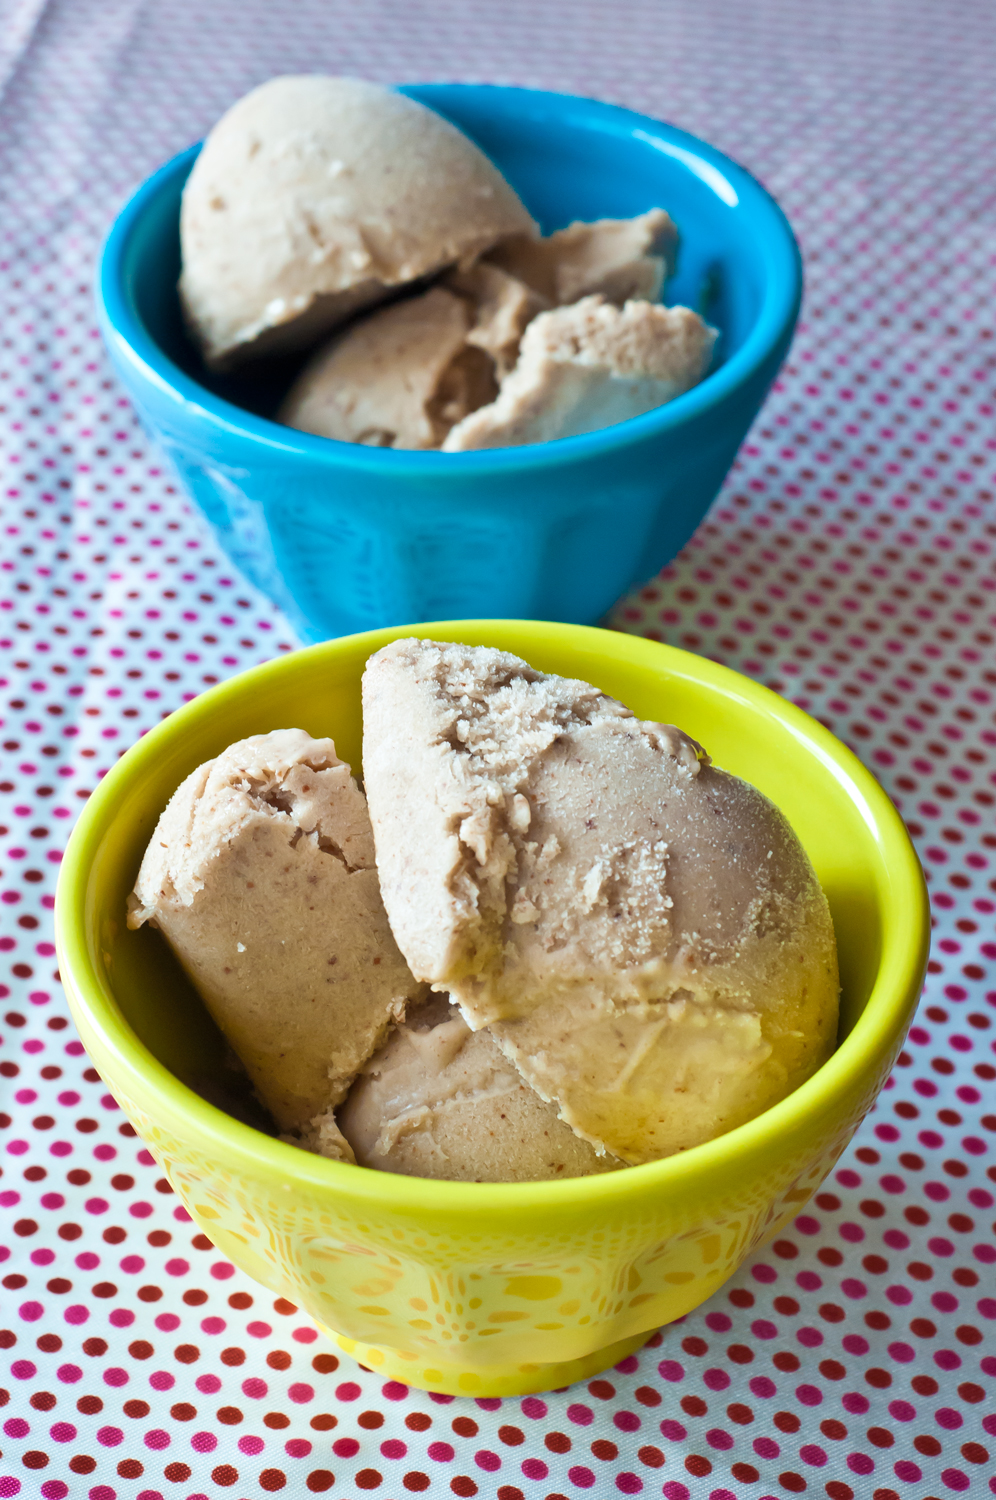
Oh, wow. I cannot believe I’ve ignored you guys like this. This recipe for banana ‘ice cream’ is really tasty, dead simple to make, whips up quick, and lasts in the freezer for as long as you need it to. It’s cheap, too, averaging however much bananas cost where you live per serving. And it’s paleo. Have I mentioned it’s also good? And filling? And healthy? And lactose free? What are you waiting for?! Ice cream waits for no man!
A good friend of mine recently made the jump to paleo (ok, it was a few months ago now) and I realized I hadn’t posted a recipe for this yet for you guys. This ‘ice cream’ is fantastic. I made it pretty much all summer last year and ended up almost living on it when the days got so hot I didn’t want to move, let alone put anything in my mouth that wasn’t freezing.
Also? It’s toddler-approved. My girl has a munchkin who loves bananas – and this dessert. It’s making its way into heavy rotation at her house as a summertime treat to combat her little guy’s first summer dealing with crazy heat.
This ice cream is surprisingly creamy for having a single ingredient and has a light banana taste when made with no add-ins. I always add almond butter because I absolutely love it and usually honey and a generous pinch of flaky salt as well. If paleo marshmallow fluff existed, that would go in as well. Ooooh. Steve’s Original Paleo Krunch (or some other grainless granola) would be fantastic here. Cocoa nibs if you’re so inclined.
1-Ingredient Paleo Ice Cream
1 banana per serving
Add-ins: I usually use 1 Tbsp. almond butter + 1 tsp. honey + a big pinch of flaky salt per serving
Peel your banana, break into large pieces, and freeze at least an hour to overnight before starting.
Put your banana + any add-ins into your blender. Blend until it looks like soft-serve. At this point, your ice cream is entirely edible – but if you stick it in the freezer for a couple of hours, you will be rewarded with a rich, dense ice cream that is so satisfying you’ll never miss the dairy – or other ingredients.
Serves however many you want it to.
A note about blending: Don’t overload your blender. Just … don’t. Even if you have a Vitamix. Your blender doesn’t want to handle 9 bananas at once and you’ll have to dig out frozen and welded-together clumps of fruit before doing the right thing and blending 2 bananas at a time max. Just be patient and wait for the first bananas to do their thing before adding more. Of course this comes from experience. Experience and my wonderful, supportive DH giving a much-deserved ‘I told you so.’
This low-in-sugar jam has a slightly smoky, slightly tangy taste in the background (don’t worry – it’s not enough to overpower the berry taste) and makes a great add-in for freezer pops, ice creams, etc.
Strawberry Chipotle Jam
1 lb. strawberries, washed and de-stemmed
2 Tbsp. sugar
In a large skillet over medium heat, mash the strawberries and sugar with a potato masher until the berries are broken up and well on their way to being somewhat smooth. The sugar should disappear.
Add
1 Tbsp. adobo sauce from a can of chipotles
2 Tbsp. Jack Daniel’s Honey
Bring up to a low boil, drop the heat and simmer (slow tiny bubbles every once in awhile) about 20 minutes or until thickened and sludgy. When you drag a wooden spoon through the mixture, you should have clear tracks left.
Pour into sterilized glass canning jars (making sure to leave some head room) and screw on the lid.
Banana pudding. ‘Nanner puddin’. Whatever you call it, it brings back childhood memories of deep bowls of sweet goodness, quick gobbling up of leftover Nilla Wafers, of licking the spoon clean. Nostalgia in a bowl.
If you’re not familiar with banana pudding, it’s a (mostly Southern) layered trifle-style dessert made from pudding (vanilla or banana), fresh banana slices, Nilla Wafers or ladyfingers, and some sort of meringue or Cool Whip topper if you’re fancy. There are a thousand recipes and philosophies surrounding the dish, and it seems like every little old Southern lady has her own tried-and-true recipe – some even come out a radioactive shade of yellow and are still fabulous.
My version takes the essential ingredients for a successful ‘nanner puddin’ – pudding, bananas & Nilla Wafers – and transforms them into a cold summer lactose-free dessert. It works. It’s not quite the same as tucking into a huge bowl of silky goodness, but it is a good treat nonetheless.
A note about using dairy-free milk in making pudding: Your box (if you buy Jello brand at least) will say that instant pudding cannot be made with soy milk. It lies. The box also calls for 2 cups of cow milk. Forget that too. If you halve the milk, soy sets up just fine. If you were to use the full 2 cups, the result would be a watery mess; but if you use 1 cup, the pudding sets up nice and stiff. You won’t get as much yield, but if lactose isn’t your friend, this is a small price to pay.
Banana Pudding Pops
1 package fat free instant Vanilla pudding
1 cup Silk soy milk (I would imagine almond milk would work too)
1 large handful Nilla Wafers
1 1/2 Tbsp. butter
1 banana, sliced thin
In a medium bowl, whisk the pudding mix and milk. Stick in the fridge and let set up at least an hour.
When your pudding is set and ready to go, crush the wafers and put into a small bowl. Melt the butter, add to the wafers, and mix well. We’re essentially making pie crust crumbles. I suppose you could omit the butter, but I wanted something that would help bind the crumbs and hopefully make them freeze in a pop without crumbling and dumping half in my lap. Success!
Slice your banana and set close by.
Fill your popsicle receptacle in layers, starting with a little pudding and adding layers of crust and banana as you go until you reach the top. Make sure each layer of crust is anchored in a layer of pudding and take care to not make these layers too thick or you risk creating an un-structurally sound pop. I made sure to end with pudding as well for the same reason. Also, make sure to bang your molds in between layers so you don’t get a bunch of empty bubbles. This isn’t the most easy thing to do with something like a rocket mold, but we work with what we have.
Freeze a few hours to overnight.
Makes 2 full and 4 almost full rocket pops. Next time I might add a drop of extra vanilla to the pudding and maybe experiment with an additional 1/4 cup of milk – I think the pudding mix can support it (it was on the thick side), but I have not tested that theory yet. If things are looking a little slack, add more banana to fill the space.
This all started with a chance encounter at a friend’s graduation party. Jack is said friend’s best drinking buddy, and it was inevitable that “he” would make an appearance. I, on the other hand, am not generally a fan, generally thinking that Jack Daniels tastes like yicky and disappointing paint thinner. Enter Jack’s sexy, swingy new cousin: Jack Daniel’s Tennessee Honey (or Honey Jack).
Honey Jack is a smooth talker. So smooth in fact, that this alcohol taste hating girl did shots without attempting to hide under the table and/or talk her way out of subsequent rounds. I took mini shots to be fair, but shots nonetheless. Shots with no chaser or fear of immediate impending death from the taste. This is (?)progress(?).
While sitting in my little chair, enjoying the crazy good potluck buffet and company of my graduate girl and the other people in her life, I hatched a diabolical idea. Honey Jack ice cream. Had to be fabulous. Must be 1st ice cream on menu for summer eating.
This singular obsession took up much of my Jack-addled attention span for the remainder of the party – egg base or yogurt? Lactose light or go for the gusto? Gelato? To Caramel Or Not To Caramel… that is the question.
The Internets came up with a fabulous template for my idea. Over at Ezra Poundcake, a Mad Men-inspired ice creamy dream, Bourbon Vanilla Ice Cream with Salted Bourbon-Caramel Sauce and Buttercrunch Toffee looked beyond drool-worthy. I’m too uncoordinated (read: lazy) to accomplish ice cream, caramel sauce and toffee at the same time for a simple summer (non fete) treat, so I just stuck with a lighter in lactose version of the ice cream. And then, because well enough should never be left alone, served it in a deliciously adult root beer float.
A note about the ice cream: The way I made it creates a boozy dessert with a nice texture (not quite as creamy as knockout rich full-lactose cream but not as ice shard-y as some “alternative milk” varieties). This ice cream was light enough that I didn’t almost die from lactose-induced bloat. I cut back on the sugar content because I always cut back on the sugar content, and this dessert was perfectly sweet to me. My DH wanted a bit more sugar (and in all fairness, the root beer float was his idea). In the float, he said it was perfect. Out of the float, he would have liked the aforementioned caramel sauce. If one of your party isn’t a freak about sugar and in love with savory desserts, go for the float. Or the caramel. I’m dying to have the graduate over so I have to make the caramel (I’m thinking dulce de leche-style creamed caramel with pecan brittle – ‘cuz what’s more Southern than bourbon & pecans?).
Not much to look at, but damn it’s good
Honey Jack Ice Cream
1 cup Jack Daniel’s Tennessee Honey
1/4 cup sugar (I used white sugar, but a brown sugar would probably be killer here. Maybe even honey)
1/4 tsp. kosher salt
1 generous cap-and-a-half vanilla extract (the best quality you can get – I prefer using extract here rather than whole beans)
2 cups heavy cream (I used the “real” stuff here)
1 cup Silk soy milk (unflavored)
4 large egg yolks
Bring the bourbon to a boil in a medium saucepan over medium-high heat. Once your bourbon hits the boil, add the sugar and salt. Stir until the sugar dissolves (about 2 minutes). Kick the heat back to medium and let go another 2 minutes while you get your next steps ready. The original recipes calls for reducing the mixture by a fourth, but I wanted a more sharp boozy taste, so I kept the boiling to a minimum.
Add the vanilla and cream and heat until a candy thermometer reads 150 degrees F (about 2-3 minutes).
While that is coming together, add your egg yolks to a large bowl and grab your whisk. Start beating the yolks. When your bourbon cream is at the proper temperature, pour into the egg mixture in a thin stream, whisking like a madwoman (or man) to incorporate enough cool air into the mix so the eggs don’t cook. Continue until the liquids are fully combined.
Add the soy milk and transfer to a bowl with a lid (or the bowl you already dirtied with a plastic wrap cover) and refrigerate at least 4 hours until thoroughly chilled. I let mine go for a full 24 hours because I made the base instead of concentrating on making dinner one night.
After everything is good and chilled, make your ice cream like usual. I use a Kitchenaid stand mixer with ice cream attachment (don’t forget to freeze your bowl overnight!).
If your ice cream comes out like mine did, it will be a little on the soft side at first. Mine took a good overnight freezing to set and never got rock-hard. My DH thinks I might not have whipped it long enough, but I think it tasted just fine, and that is all that matters.
Makes enough for 2 nice-sized summer night ice cream bowls and 3 generous root beer floats.
This was our second batch of ice cream made with the Kitchenaid mixer ice cream maker attachment, and like the first attempt, it wasn’t half bad. Where the first attempt was eggy and a little on the brittle side, this version had zero eggs and a a nice creamy mouth feel. It was too sweet by far, but the texture was pretty decent. Not quite like Ben & Jerry’s and I’m not 100% sold on the cornstarch slurry, but not bad.
Not bad. Not bad at all.
Almond Milk & Cream Cheese Ice Cream with Oreos
This recipe is based on Dana Treat’s Cherry Crisp Ice Cream, which was in turn adapted from Jeni’s Splendid Ice Creams at Home
2 c. almond milk
1 1/4 c. heavy cream
1.5 oz. cream cheese, softened (we used reduced fat Neufchâtel)
1 Tbsp. plus 1 tsp. corn starch
1/8 tsp. fine sea salt
a slack 2/3 c. white table sugar
2 Tbsp. agave nectar
2 caps vanilla extract
1 1/2 c. crushed Oreos (we used reduced fat)
Place the bowl of your Kitchenaid mixer ice cream maker in the freezer 24 hours prior to your desired ice cream having.
Make the component parts:
Cornstarch slurry: mix 2 tsp. almond milk with the cornstarch in a small bowl to form a smooth slurry.
Cream cheese: mix cream cheese and salt together in a medium bowl until smooth and well combined.
Cookies: crush Oreos. Resist the temptation to visit the bowl of cookie bits between steps.
Chilling Station: place a large bowl in the sink, fill with ice and water.
Make the ice cream base:
In a medium pot over medium-high heat, combine remaining almond milk, cream, sugar, agave nectar and vanilla. Bring up to a boil and keep it there for 4 minutes. Watch your pot like a hawk, or it is going to boil over. If your pot continues to boil over like mine tried to, pull it halfway off the heat if you can, and if not, knock the heat back a little until the boil is less enthusiastic.
Remove from the heat and whisk in your slurry.
Return to the heat and cook, stirring, about 1 minute or until slightly thickened. Remove from the heat for good this time.
Slowly pour the milk mixture into the cream cheese mixture, whisking until smooth. Pour into a 1 gallon freezer bag and submerge as best you can in the freezing water. Let stand until cold, about 30 minutes.
Ice cream it:
Assemble your frozen ice cream maker attachment right before the 30 minutes is up. You want this sucker to still be near-freezing when you add the ice cream base.
Carefully pour your ice cream base into the frozen ice cream maker bowl and let spin on mix until thick and creamy, about 25 minutes. Add the cookies and let go another 5 minutes.
Spoon out into your container of choice and freeze until your desired serving consistency is reached; for us this was about an hour.
This made an interesting first stab at ice cream. Eggy, with a strange flavor profile from the Avocado honey. If you haven’t had Avocado honey, it’s hard to describe. It tastes like honey, just with a bit something… extra(?) different(?) added. It’s good, and this ice cream was certainly delicious, but next time I might go a little more traditional in my flavor profile interpretation. The egg content in this recipe is on the heavy side in an attempt to compensate for the almond milk. I mostly followed the recipe from Saucy Kitchen for this first foray because I just wasn’t sure how almond milk would react in an an ice cream. It turns out, it reacted just fine–this ice cream was not as dense and creamy as Ben & Jerry’s, but also gave me no stomach pain from the small amount of dairy I ended up using, either. I’ll take it. I may try slipping some yogurt in next time, and possibly even white sugar. While I normally avoid it like the plague, I think a basic sweet taste might work better in this application. Agave nectar might also prove a nice neutral sweet. Custardy Almond Milk & Cream Ice Cream with Honey and Cookie Dough This recipe was cobbled together from: Honey Ice Cream from Saveur Magazine, Almond Milk Ice Cream from The Saucy Kitchen and the Kitchen aid Ice Cream Maker Manual and Recipe Book
2 1/2 c. Almond milk
1 1/2 c. heavy cream
8 egg yolks
3/4 c. honey, I used a local Florida Avocado variety
1 cap vanilla extract
1 vanilla bean, split and scraped
half a batch of chocolate chip cookie dough, chopped into small pieces
At least 24 hours before you intend on making ice cream, put your Kitchen aid ice cream mixing bowl attachment in the freezer.
Over medium, heat the almond milk and cream until just simmering. Remove from the stove.
In a mixing bowl if you’re too short to reach the mixer and your partner in crime is off for a run (or in the bowl of your mixer if you aren’t similarly vertically challenged), beat egg yolks until they lighten in color. This takes awhile and I wouldn’t advise using a whisk. You’re not looking for really really light, but you want a significant shade change. Add honey and beat some more until the honeyed eggs form a ribbon when the beaters are pulled out of the bowl.
Add the creamy milk slowly(!) so you don’t cook the eggs. Keep stirring and adding until all the creamy milk is incorporated. Return the whole shebang to a pan and heat to 170F (this is the safe way to kill all bacteria that may or may not be hanging out in your eggs). Usually I’d toss caution to the wind and eat my eggs raw, but I’m not entirely sure this doesn’t help with the final product. I need an Alton Brown refresher! Cook down until the mixture coats the back of a spoon nicely and leaves a track when your finger is dragged through it.
Cool. This can be done in a cooler, in pans over ice, or on the counter top if you are very patient. You’re looking for room temperature here.
Once the mixture hits room temperature, mix in the vanilla bean and vanilla extract. I used a combo, which was just fine, but I might advise to either go for broke with the vanilla pods and use 3 or ditch them all together for more extract. I would imagine two teaspoons would suffice. If you want any other flavorings, add them now. Rum? Almond extract? Anything in the liquid family.
Move your getup to the freezer if you’re using pans like I did and cool to at least 40F.
Pour into the ice cream mixing bowl and turn the machine on low. Churn 25 minutes, add cookie dough, and churn an additional 5 minutes. You’re looking for the ice cream mixture to double in size and the cookie bits to be well incorporated.
And viola! You have a completely passable ice cream. Makes 6 moderate servings.