Less Sweet Pumpkin Oat Bread

This recipe started life as a roasted Kabocha cake sent in a newsletter by Aran Goyoaga from Cannelle et Vanille and ran rampant from there. That cake was fabulous, but with the amount of sweet things I made for the rest of Thanksgiving (I went for maple pecan as the theme) and the amount of leftovers I still had – I couldn’t handle the sweet for days on end for breakfast.

So I tinkered.

Now, I don’t bake. I hate baking. I’m not a “rules” person and don’t have a clue what ratios are proper in baking to make things work. Super not confident there, but I decided to charge ahead anyways with my newfound beginners luck (I heavily modified the recipe the first time I made it because of fancy thickeners and the like I couldn’t find here either at all or for under a Kings ransom).

I boldly went. Aaaaaaaaaand attempt 1 was gar-baage. Too much baking soda(?) Cornstarch(?) One bite absolutely killed my palate and made all things taste like weird basic metals for like half the day. Oops.

Attempt 2 was much more successful, despite the fact that I think I overcooked mine a bit. The taste is good, but I would caution with this bread to cook until just set for a moist cake like texture. Mine ended up still moist – mostly – but also crumbly around the edges and kinda dry.

I may do a version 4 with applesauce and more oats if I ever actually figure out what I’m doing.

gluten-free

Less Sweet Pumpkin Oat Bread

1 c roasted or canned pumpkin (I used roasted butternut squash in 2 versions and canned pumpkin in 1 and think I preferred the butternut)

1/4 c maple syrup

1/4 c brown sugar

3 eggs

3/4 c oil (I had grape seed on hand but olive would be much more cost effective)

1 c roasted rice flour (I have no idea if other flours would work – the original recipe called for superfine rice flour and I was surprised to see rice flour is super cheap where I live – check the Indian aisle if you are lucky enough to have one in your grocery)

2 Tbsp cornstarch

2 tsp baking powder

1/2 c rolled oats

1 Tbsp turmeric

1 Tbsp cinnamon

1 tsp nutmeg

2 tsp ground ginger

2 tsp cardamom

Big pinch salt

Pumpkin seeds

Preheat your oven to 200C, grease a loaf pan and cut a strip of baking paper long enough to hang over the sides of your pan lengthwise so you have a good handle to lift the cake with.

In a large bowl, mash the orange squash of your choice with the maple syrup, sugar, eggs and oil. Whisk until smooth.

Add the flour, cornstarch, baking powder, oats, spices and salt. Whisk together until well incorporated.

Pour the batter into the pan and sprinkle with a generous helping pumpkin seeds.

Cover with tinfoil and bake 40 – 50 mins or until just set.

Serves 6 – 8
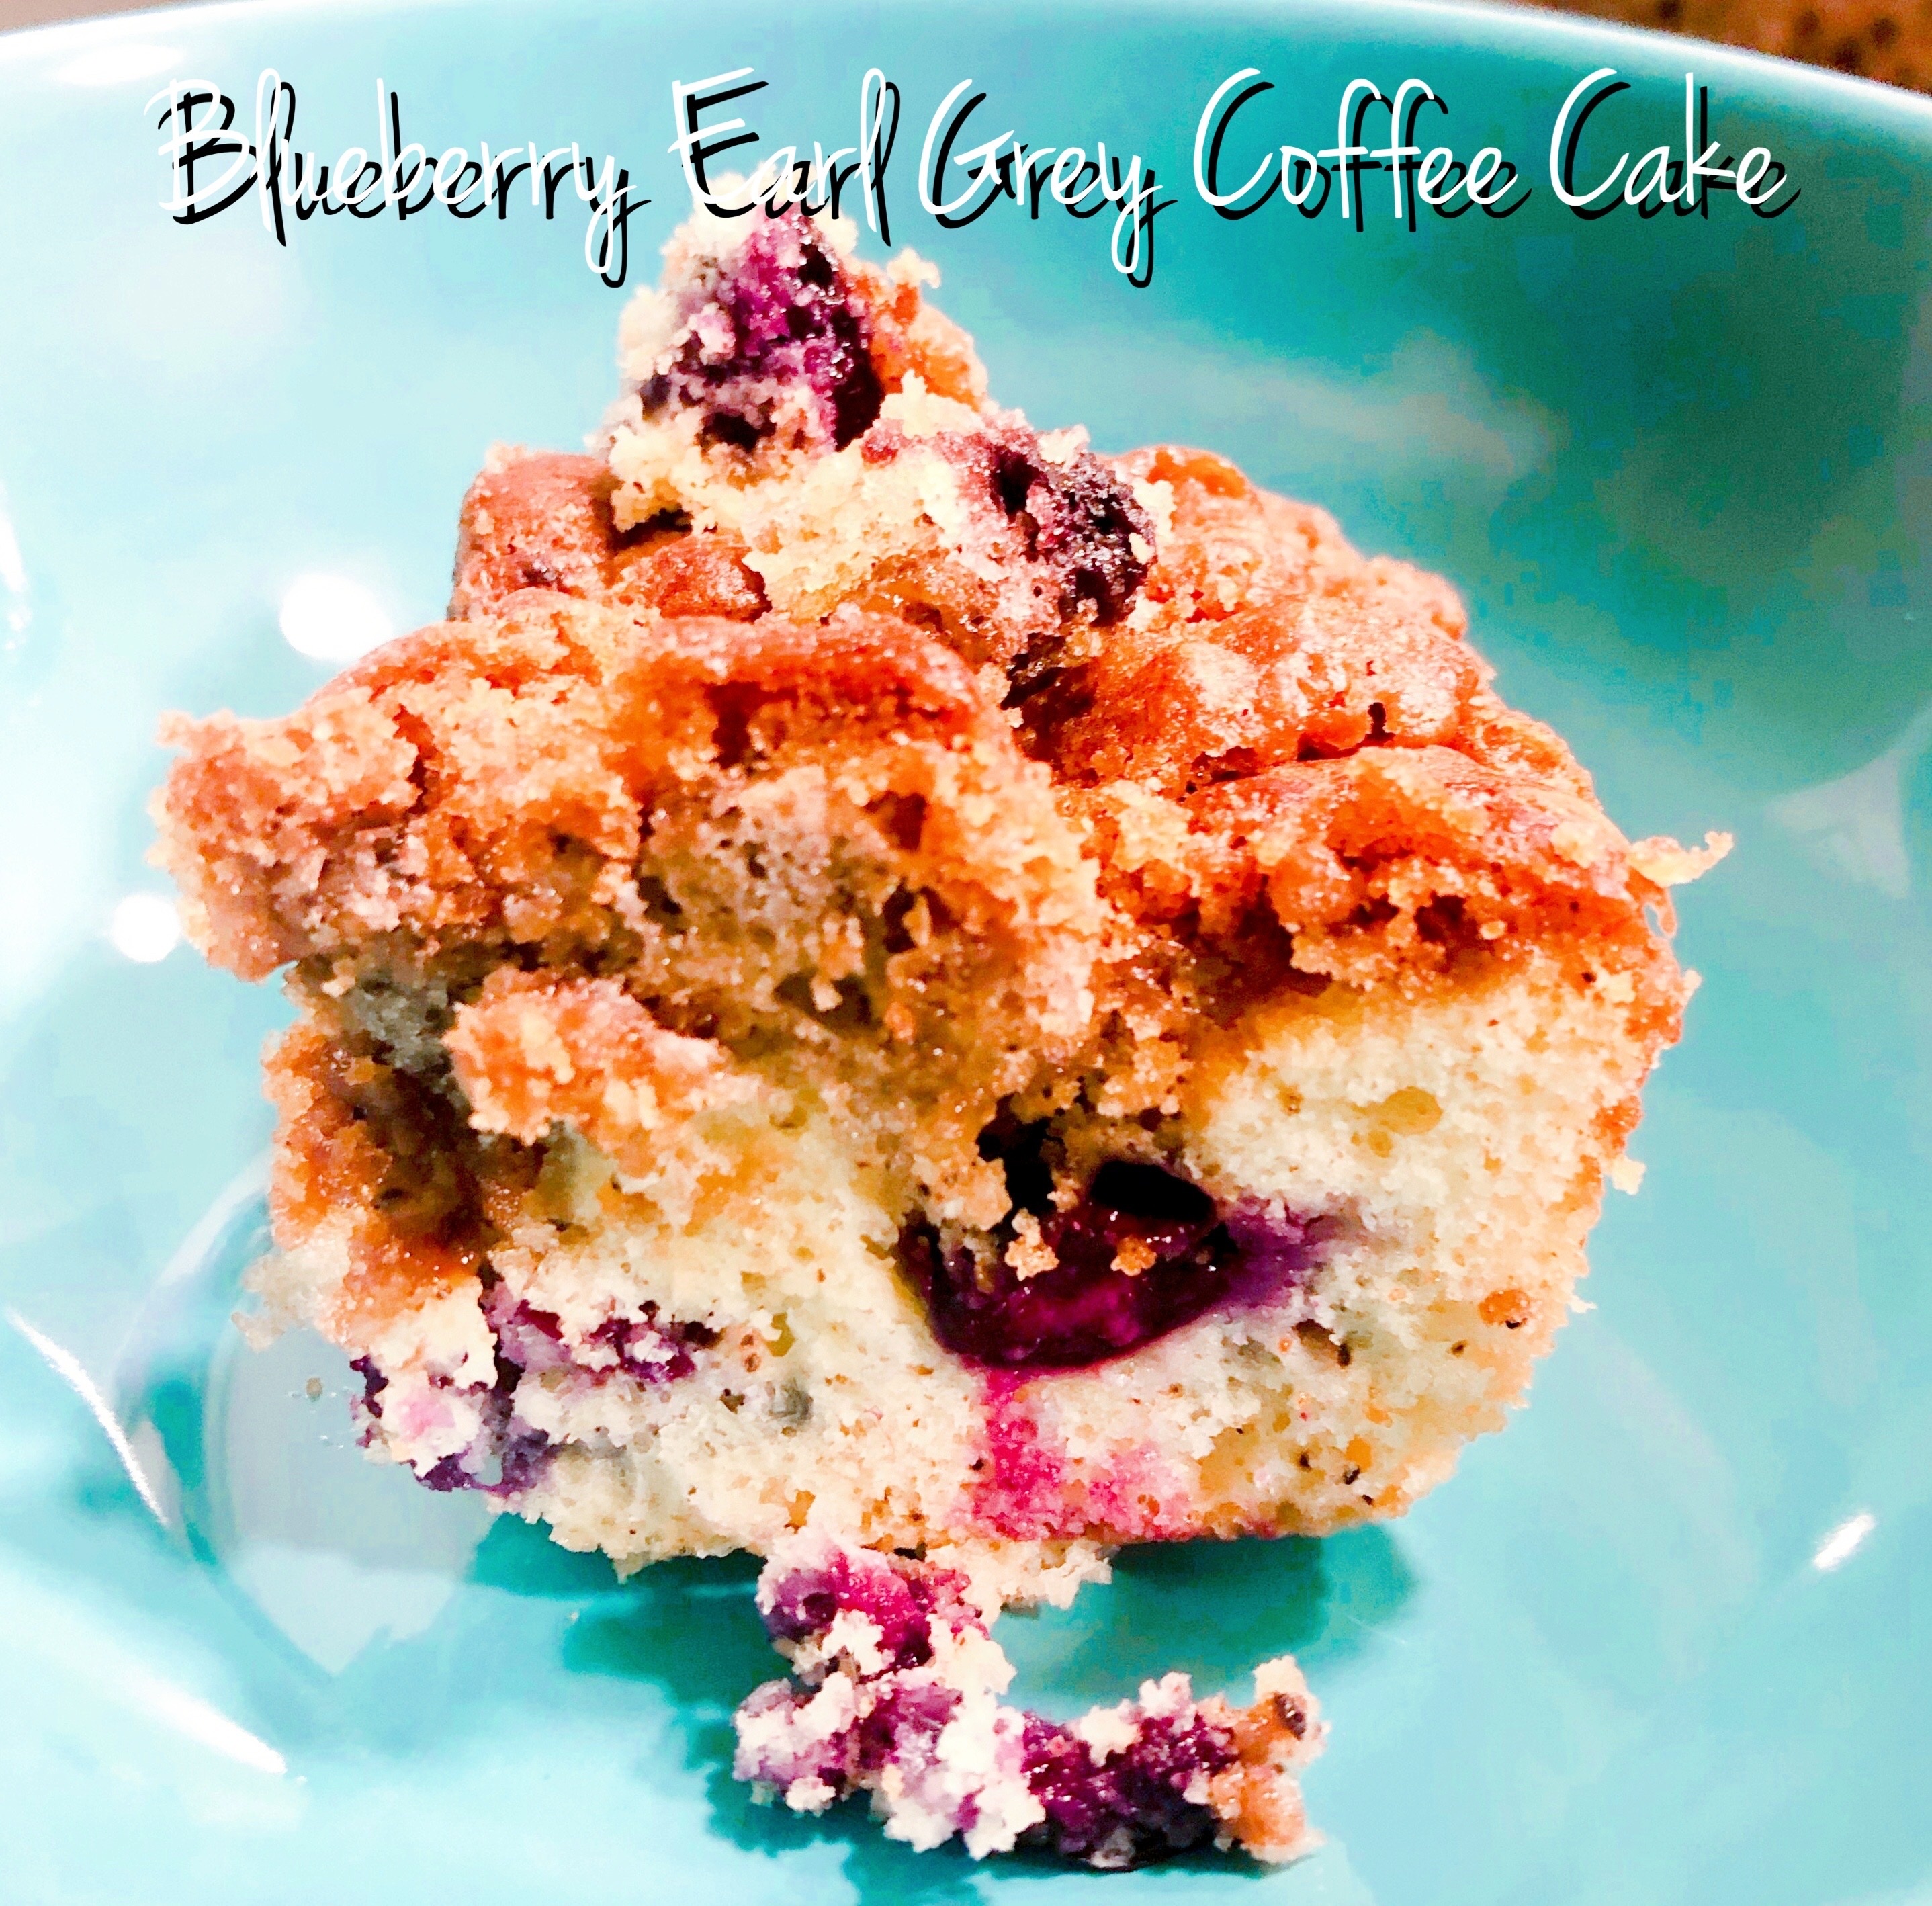
Blueberry Earl Grey Coffee Cake

This recipe was inspired by the amazeballs blueberry lavender coffee cake with lemon curd I had at the St. George bakery while celebrating a friends wedding in Helsinki.

This coffee cake was fantastic. Full of blueberries, on the thin side for a coffee cake, deeply caramelized, with a really great herbaceous hit in the bites with lavender.

So freakin delicious.

This recreation isn’t that, but it’s good. Couldn’t find lavender and forgot about the lemon, but the coffee cake turned out well. Next time, I’d use steeped tea in place of the water and maybe add a touch more tea leaves – maybe another half bag – some people could taste the tea, but I didn’t get the slightly bitter note I was going for. I would also maybe just use blueberry purée instead of jam – the cake was a touch sweet for my taste for multiple servings.

Vegetarian (lacto-ovo)

Blueberry Earl Grey Coffee Cake

Cake

15.25 ounce box yellow cake mix, reserve 1 cup
2 eggs
2/3 cup water (or strong brewed tea)
1/2 cup all purpose flour
1/4 cup canola oil
1 bag Earl Grey lavender tea, pulverized time dust

Topper

1/4 cup blueberry preserves
As many blueberries as you want

Crumble

1 cup reserved cake mix
1 cup packed brown sugar
1/4 cup melted butter
1 teaspoon cardamom
1 teaspoon cinnamon

Preheat your oven to 350 F/180 C.

Line a small casserole with baking paper and spritz with oil.

In a large bowl, combine the cake ingredients. Mix with electric beaters on low until the dry ingredients are incorporated. Scrape the sides of the bowl to get everything and mix until no lumps are left.

Turn out into the prepared pan, reserving about 1/4 cup of the batter. Sprinkle the blueberries over the top of the cake.

Mix the jam with the reserved cake batter and pour over top.

In a medium bowl, mix the crumble ingredients with a fork until combined into crumbs & pebbles. If your mix is a little wet, add a sprinkle of flour.you’re looking for a mix of sandy crumbs and small pebbly bits.

Sprinkle crumble over the cake.

Bake 22 – 30 minutes or until a knife inserted in the middle comes out clean. If your cake is browning too quickly, tent with foil.

Serves a bunch

Mango Coconut Ice Cream

The FODMAP-friendly, vegan Dole Whip I was working on this week didn’t work near as well as this dessert I made a couple weeks ago – which is a bummer, because this was awesome and mangoes are a no-go at the moment.

Gluten-free, Paleo, vegetarian, vegan, elimination diet

Mango Coconut Ice Cream

1 cup full-fat canned coconut milk
1 1/3 cups frozen mango
1 tsp. vanilla extract

Blend all together and freeze. Serve topped with your favorite berries.

Serves 4

Low Carb Strawberry Parfaits

This dessert is delicious, low carb and light – aaaand it also tastes fancy because of the fresh fruit and different textures.

It’s also, as it turns out, dead simple to make and quick to set up.

Gluten-free, primal, keto

Low Carb Strawberry Parfaits

1 package sugar free strawberry jello
1 cup boiling water
8 ounces softened cream cheese
Juice of half a lemon
1/4 cup almond flour, almond meal or ground almonds
2 Tbsp. melted butter
1/4 cup almond slivers or shaved almonds
12 fresh strawberries

First, make your jello by whisking the jello powder into the hot water until fully dissolved. Let sit 2 minutes. Full disclosure: I screwed this part up and had lumpy jello, so I slapped the whole mixing cup I was using back into the microwave for another minute or so, whisked the crap out of the mixture and crushed all the lumps I could with the back of a spoon. The result was mostly not-lumpy jello. 

When your jello has rested, add to the cream cheese and beat with electric beaters – or do things the hard way. I was already looking at grating my own cheese and wasn’t trying to exhaust myself by 8:30 am on Thanksgiving morning. #delicateflowerproblems

Spread into a metal or glass pan kinda evenly and let chill for an hour or two.

While the fluff is chilling, toast your almond slivers and make a simple buttery almond crumble by combining the butter and almond flour and baking (I think I baked at roughly 220C which is what I seem to bake everything at because I think it’s like 375F) for 5 – 10 minutes or until the mixture is golden and kinda looks like a cookie.

To serve, put a little crumble into the bottom of a teacup or glass, top with a sliced strawberry, a scoop of fluff, almonds, more fluff and more almonds – garnish with a second strawberry.

Makes 6 teacup sized portions

Mini Low Sugar Apple Tarts

These personal sized apple tarts were a big hit this past Thanksgiving. They’re light, just enough for one person, and the combination of spices lends a little mystery.

Vegetarian

Mini Low Sugar Apple Tarts

1 granny smith apple
6 roughly 4 inch x 4 inch squares phylo dough or puff pastry
No added sugar or sugar free apricot preserves
A few Tablespoons melted butter
1 packet stevia
2 tsp. ground cinnamon
1 tsp. ground cardamom
1/2 tsp. ground nutmeg
Honey
Juice of 1 lemon
Himalayan pink salt

First, thaw your phylo dough for at least 10 minutes or until soft. If you have squares like I did, cool – if not, cut them while the dough is still semi-frozen.

Then, prep your apples by thinly slicing into wedges. I went really thin here – preferring a kind of wafer thin thing going on. Toss your apples in half the lemon juice so they don’t oxidize before they hit the oven.

Next, prep your cinnamon sugar by dumping the “sugar” and spices into a small dish and stirring.

Spread a thin layer of preserves over each dough square, going almost to the edges of each.

Arrange your apples however you like – I went for a pinwheel.

Drizzle with melted butter.

Sprinkle the cinnamon sugar over top.

Sprinkle lightly with salt.

Pop into the oven for 20 – 25 minutes on whatever temp your package says (I think mine was 200C). Watch after 15 minutes – you’re looking for the dough to rise and brown and the apples to be soft. Mine were really thin, so my apples got a bit caramelized but noone seemed to mind.

While your tarts are baking, take the leftover spices (I think I used about half on the tarts and half in the topper), and add to a small saucepan with a couple Tablespoons apricot preserves, about a teaspoon of honey, and a large squirt of lemon juice. Heat over low to combine.

Drizzle over the tarts when they get out of the oven.

Serves 6 

Sun Butter Fat Bombs

Pretty much all I want in a dessert is a spoon full of peanut butter. Or almond butter. Or Sun Butter.

This fat bomb is a great way to get a nice little fat boost while not having to deal with the chocolate that always seems to get in the way of what I really want.

Note: Like my other fat bomb recipe, I slused small square silicone ice cube trays to portion. Each portion is 2 squares.

Keto, Paleo, gluten-free, vegetarian, vegan


Sun Butter Fat Bombs

1/4 cup melted cacao butter (you can use coconut butter, coconut oil or coconut manna, but will need to keep the Bombs in the freezer)

1/4 cup sunflower seed butter (or other nut butter – sugar-free is best; cashew butter may be too carb-heavy)

4 drops vanilla stevia (optional)

Sprinkle Himalayan pink salt

In a large measuring cup, melt the fat. Whisk in the butter until completely smooth. Add the stevia and stir.

Pour into the molds – you should have 11 or 12.

Freeze to solidify and then either keep in the freezer, or if you used cacao butter – you can also keep in the fridge.

Makes 5 – 12 servings depending on how much you want per serving

Paleo Peach Crumble

I don’t go for desserts often, but I find myself lately with a glut of fresh almond meal that needs using (more on why later) – dessert seems like the logical outcome. Plus: peaches. Can we talk about peaches that have been graced with heat?

d-e-l-i-c-i-o-u-s

This recipe isn’t instant, but scales beautifully to serve more – these peaches would be absolutely fabulous with some of that coconut whipped cream I made for a party, or some of my favorite 1-ingredient ice cream.

Vegetarian, Vegan, gluten-free, paleo

_DS35268w

Paleo Peach Crumble

2 peaches, halved and pitted
1/4 c. almond meal (either plain from the package, or leftover from making almond milk)
1-2 Tbsp. melted ghee
1 tsp. vanilla (optional – if you use plain flour, it would be a nice touch)
Cinnamon or Pumpkin Pie Spice
Kosher salt

Preheat your oven to 375 fahrenheit. While your oven is coming up to temperature, either grab some oven-proof ramekins or line a cookie sheet with foil. I love the ramekin for baking this item because it looks pretty, feels fancy, and puts my ramekins to better use than being a handy cherry tomato-to-mouth conveyance method.

Place your halved peaches cut side up in/on your cooking vessel and sprinkle with pumpkin pie spice or cinnamon and a pinch of kosher salt.

In a small bowl, combine the almond meal and ghee and work with your fingers until you have crumbly flour. Sprinkle over the peaches (you don’t want a whole heap here – go for a moderate amount and the crumble will toast more evenly).

Bake 25-30 minutes, or until the peaches offer no resistance to a fork and the topping is nice and browned.

If desired, drizzle with some honey or maple syrup and top with a dollop of coconut whipped cream or scoop of 1-ingredient paleo ice cream.

Serves 2-4, depending upon how heavy a dessert is warranted. 

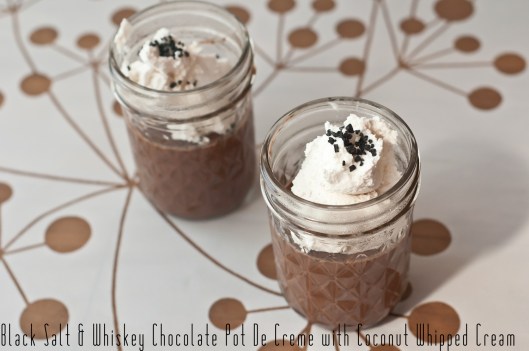
Black Salt & Whiskey Chocolate Pot De Creme

Yum. Y-U-M. This dessert is a show stopper. It tastes crazy decadent, is easy to make, and it’s dairy free. The dessert trifecta.

Gluten-free and easily adapted to be paleo (just omit the whiskey and use all plain dark chocolate)

_DS35005w

Black Salt & Whiskey Chocolate Pot De Creme
Based on Nom Nom Paleo’s Mexican Chocolate Pots De Creme

Pudding

2 cans full-fat coconut milk
4 large egg yolks
12-14 ounces dark chocolate (I used a combo of caramel black salt 70% dark chocolate & plain 85% dark chocolate)
1-2 shots of your favorite liquor (optional if strict paleo) – I used 2 shots of Honey Jack
1 tsp. vanilla extract
Black salt (or any nice flaky salt) for garnishing

Coconut Whipped Cream

1 can coconut cream, refrigerated for a few hours to solidify
2-4 tsp. Grade B maple syrup
2 tsp. vanilla extract

Finely chop your chocolate and place into a large bowl.

In a medium saucepan over medium-low heat, add your coconut milk and egg yolks. Whisking/stirring constantly, cook until the mixture thickens and forms a smooth custard that coats the back of a spoon (20-25 minutes). Yes, I’m aware that constant mixing/whisking is a pain in the ass. It’s worth it. You need to watch your custard Like A Hawk to make sure it doesn’t overcook. Steaming is good/simmering is bad. You don’t want cooked eggs here.

When the custard is ready, take off the heat and pour into the chocolate bowl through a fine mesh sieve. The sieve will catch any lumpy bits of undesirably cooked custard and will result in a smoother finished texture. You want a smooth finished texture, right? Don’t cut corners here.

Now walk away. For Five Minutes. Don’t stir the chocolate custard, don’t look at it – don’t sniff it – don’t touch it – just walk away. Torture, I know, but do it.

After your five minutes in non-stirring purgatory are up, gently stir the custard into the now-melted chocolate with a spatula. Gently! If you stir too fast, you’ll end up with grainy chocolate. Once your chocolate is fully incorporated, add your whiskey and vanilla extract and stir again to combine. Divide the mixture into your serving vessels – I used eight 8-ounce mason jars and filled them about 3/4 of the way.

Refrigerate 4 hours to a day to set up. Now would be a good time to put the coconut cream into the fridge so it solidifies.

When you’re ready to serve, make the whipped “cream”.

In a large bowl (or the bowl of a stand mixer), carefully spoon out the solidified coconut cream, leaving the coconut water behind. If you couldn’t find coconut cream and grabbed coconut milk instead, no worries – this trick works perfectly fine with a can of full fat coconut milk; you just won’t have as much yield.

Add 2 tsp. maple syrup and 2 tsp. vanilla extract and whip however you want (a stand mixer is awesome here) until stiff peaks form. This won’t take nearly as long as it would had you used dairy cream. Taste. If it’s still a little coconutty, add 2 more tsp. maple syrup and maybe a pinch of salt.

Spoon over the pot de cremes to serve. Sprinkle with black salt to garnish.

Serves 8+


Macadamia Nut Ricotta Dessert Snacks – 2 Ways

Even though these two variations on a theme are kind of like incomplete thoughts, I thought they warranted a blog post because they are both so good. I happily munched on both for an afternoon snack – and they would have both been great bulked up by, say, a sliced apple.

Or maybe with some sort of baked good in a dessert?

For either dessert snack, scale up as appropriate. I had 1/4 cup left to play with, so ended up making two amuse sizes.

However you slice it, delicious stuff.

Gluten-free, paleo, vegetarian, vegan, and Whole30-compliant (basil lime version only)

Macadamia Nut Ricotta

2 cups raw macadamia nuts
Big pinch Kosher salt
1-2 Tbsp. lemon juice (juice of 1/2 to 1 lemon)
1/4 to 1/2 cup water

Blend the macadamia nuts, salt, 1 Tbsp. lemon juice & half a cup of water until smooth, adding more water if necessary to hit the right consistency. Taste for acidity and salt, adding more lemon juice or salt as needed.

This recipe seems to be everywhere on the Internet. I was finally spurred on to action by Nom Nom Paleo’s Food For Humans book – but have seen it 999 other places.

20140329-122031.jpg

Macadamia Nut Ricotta with Lime and Basil

2 Tbsp. macadamia ricotta

Zest of half a lime

2 tsp. fresh lime juice

1 basil leaf, chiffonade

Combine the ricotta, lime juice and lime zest. Top with basil and more zest. Serve … on a spoon? I ate this one plain happily.

20140329-121939.jpg

Macadamia Nut Ricotta with Orange and Honey

2 Tbsp. macadamia ricotta

2 tsp. orange juice (I used tangelo)

Zest of 1/4 an orange (or tangelo, which is what I used)

1/2 tsp. honey

Orange segments to serve

Honey to drizzle

Combine the ricotta, juice, zest and honey. Top with more zest and a drizzle of honey. Serve with orange segments.

Dairy-free Irish Cream Liqueur

This recently-unearthed gem is something my family has been making for holiday get-togethers since at least the late 70s. I remember my mother gleefully bringing this handwritten prize home from my great aunt’s house and making batches upon batches for holiday gifts.

I am happy to say that a dairy-free, updated version is tasty enough to gift as well.

20131223-091137.jpg

Dairy-free Irish Cream Liqueur

3 large eggs
1 1/4 cup brandy
1 14 ounce can coconut milk
1/4 cup honey
1 3/4 cups almond milk
1 Tbsp. Cacao powder
1 1/2 Tbsp. Instant coffee
1 1/2 tsp. vanilla extract
1/2 tsp. almond extract

First, make some paleo-fied sweetened condensed milk. Add the coconut milk to a small pan over medium high heat and heat to boiling. Quickly whisk in the honey and cut the heat to a simmer. Watch your milk carefully – coconut milk boils over as easily as cow milk.

Simmer 30-45 minutes, or until the liquid reduces by half. Cool completely before using.

Combine the paleo-fied sweetened condensed milk with the rest of the ingredients in a blender and blend until smooth.

Makes about 5 cups. Store in the refrigerator, tightly covered. Keeps up to 1 month. Shake before serving. Cheers!

Excellent alone, in coffee, in a milkshake, with cereal, and blended with ice.