Mmmmmmm…… lil baby cabbages. If you haven’t noticed, I love brussels sprouts. Luckily, so does my DH – so we have them quite often around here; generally just cooked simply with a little bacon grease or ghee and tossed with mustard. And they’re delicious.
But this time I wanted to go French-ish and wanted some crunchy bits to serve as a contrast for the wine-braised short ribs I made.
This recipe was intended to serve as a side for two, but as providence would have it the hubbs was called away at the last minute, and I got to eat the whole damn thing myself. And eat it all I did. With delight.
Vegetarian, Vegan, Gluten-free, Paleo, Whole30
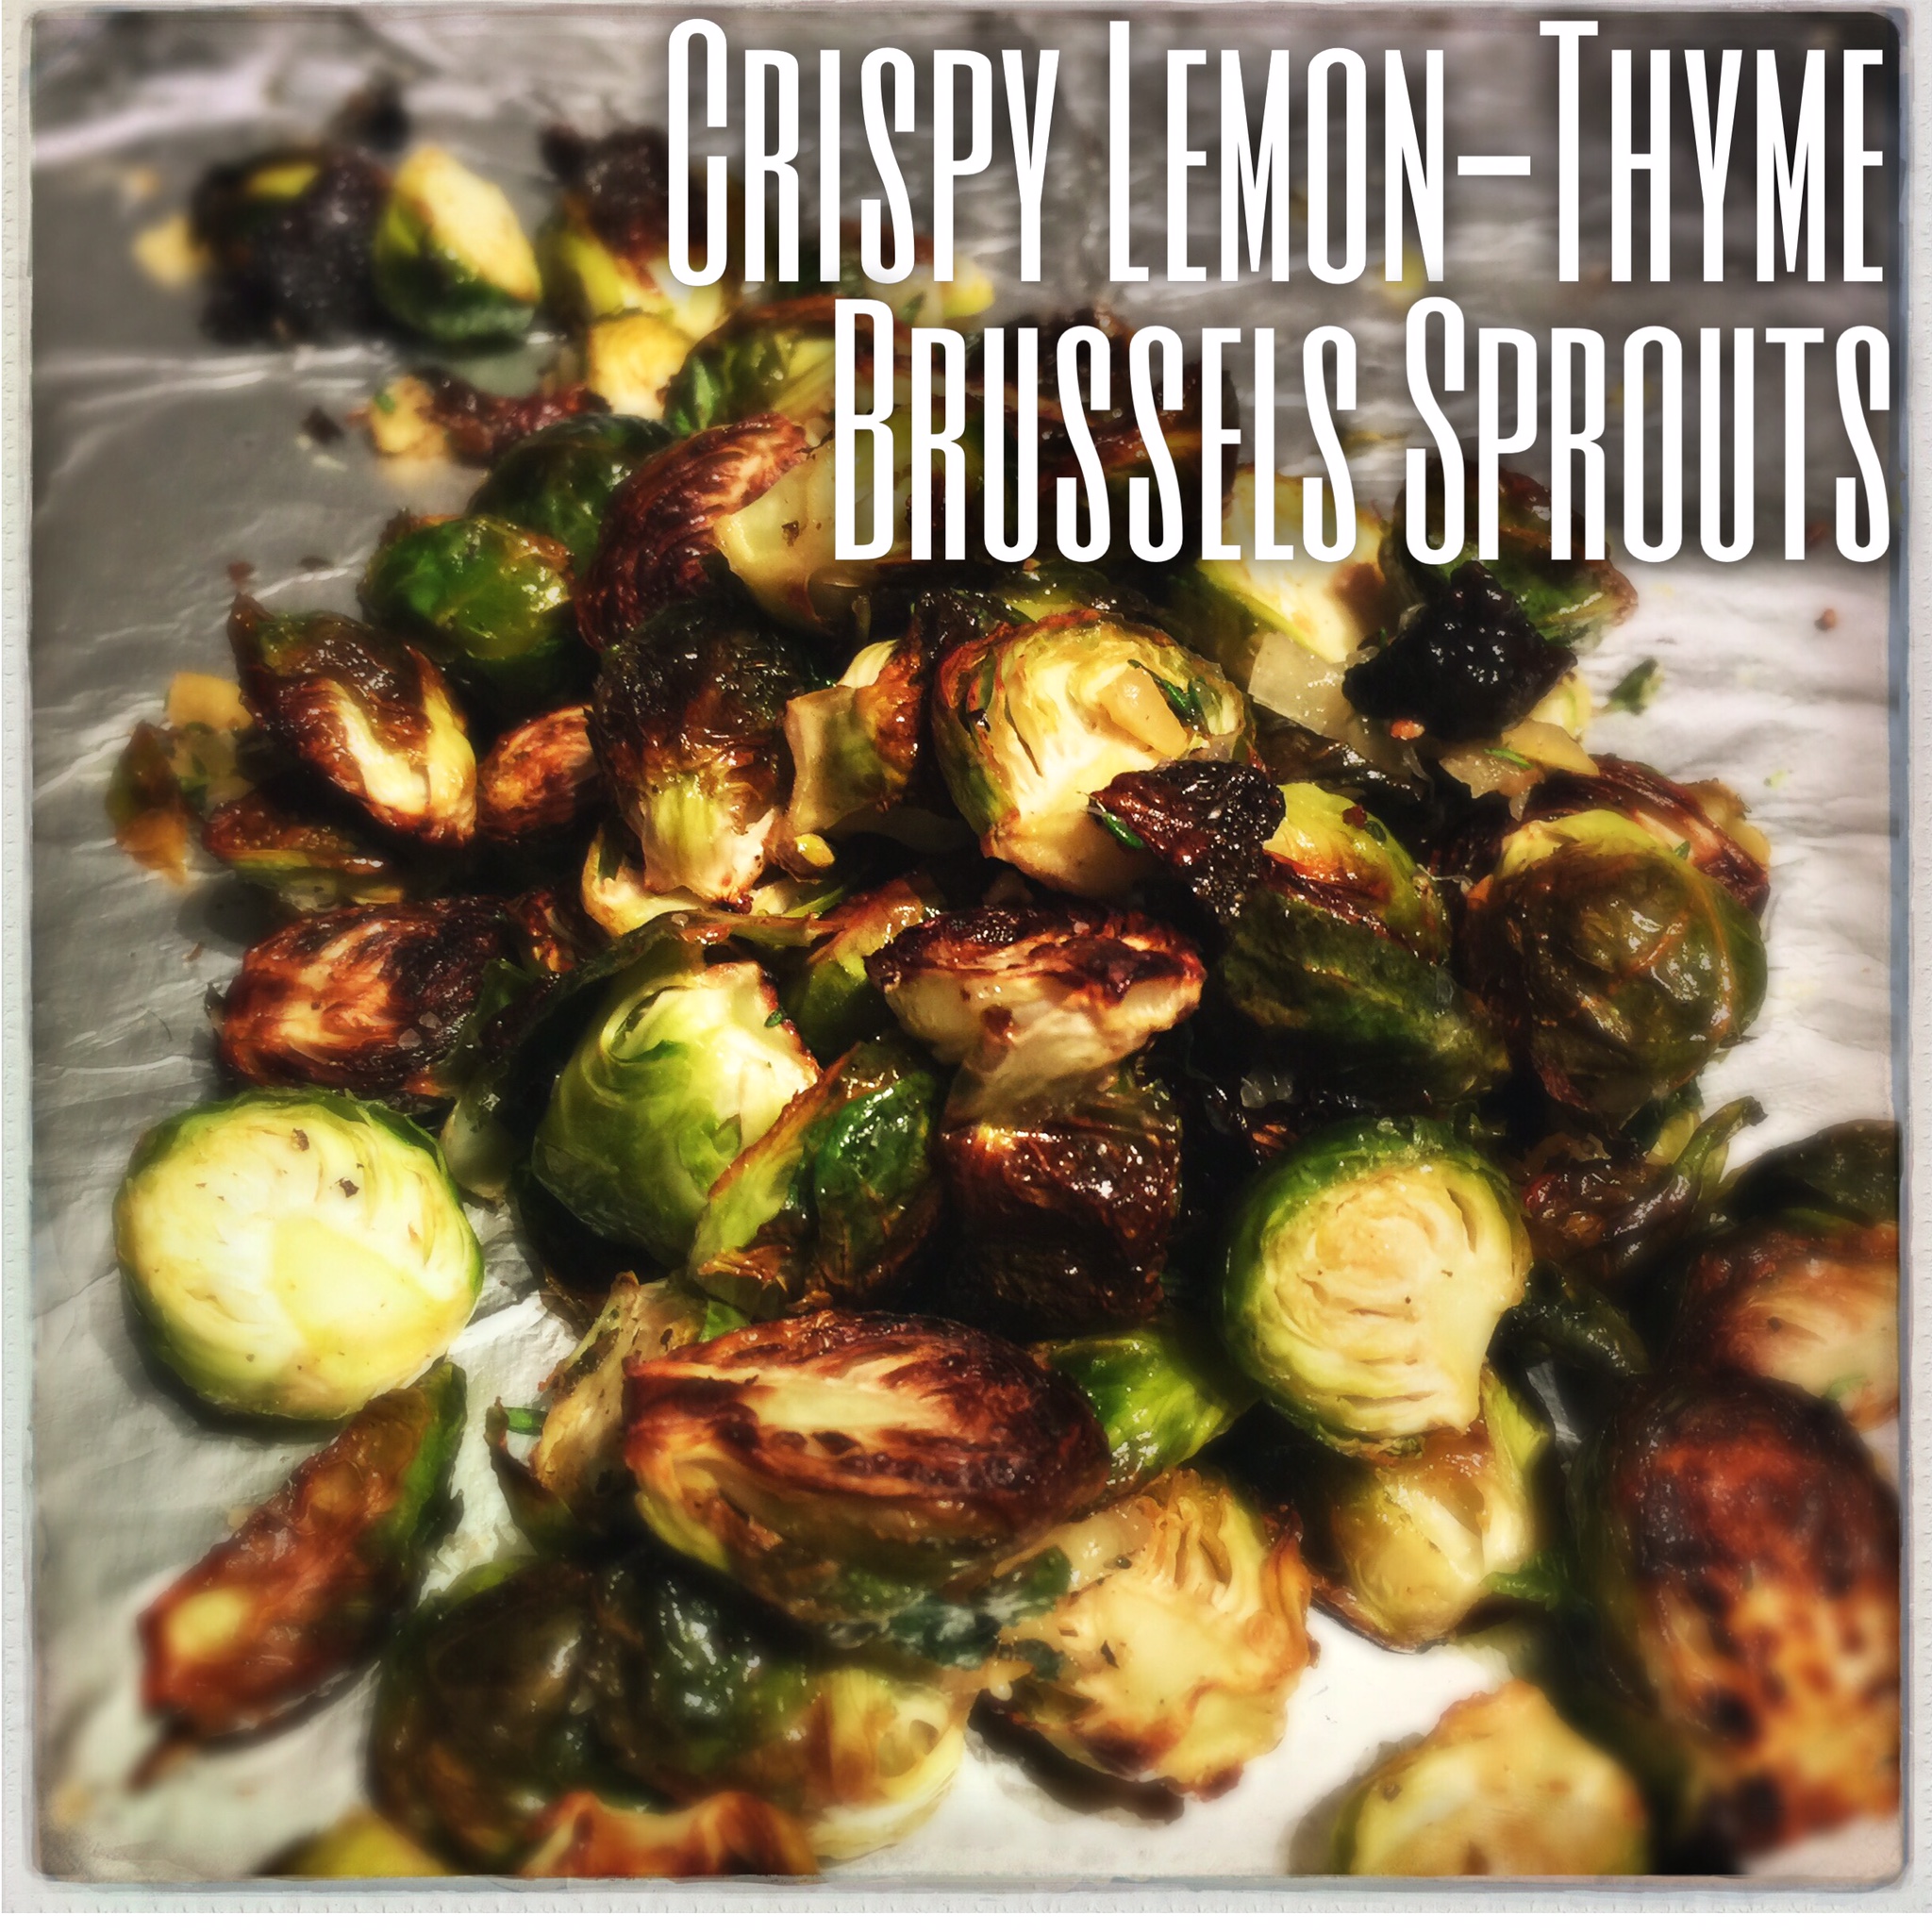
Crispy Lemon-Thyme Brussels Sprouts
1 bunch brussels sprouts (I had about 2c)
1 Tbsp. coconut oil
Kosher salt & pepper
1/4 a preserved lemon
2-3 sprigs fresh thyme
Preheat your oven to 400 F.
Rinse the brussels and quarter or halve so you end up with roughly half inch portions. Toss in the coconut oil and sprinkle with salt and pepper. Arrange on your baking sheet – making sure not to crowd – so that you have room for air to circulate between each piece. Bake 10 mins, stir and bake another 10 minutes. Check. If they’re crispy now, great, take them out. If not, let go a couple more minutes until they’re crispy but not incinerated.
While the brussels are working, mince your preserved lemon (you want 2 Tbsp.) and chop the thyme (1-2 Tbsp.).
When the brussels are ready, toss with the lemon and thyme and serve.
Allegedly serves 2