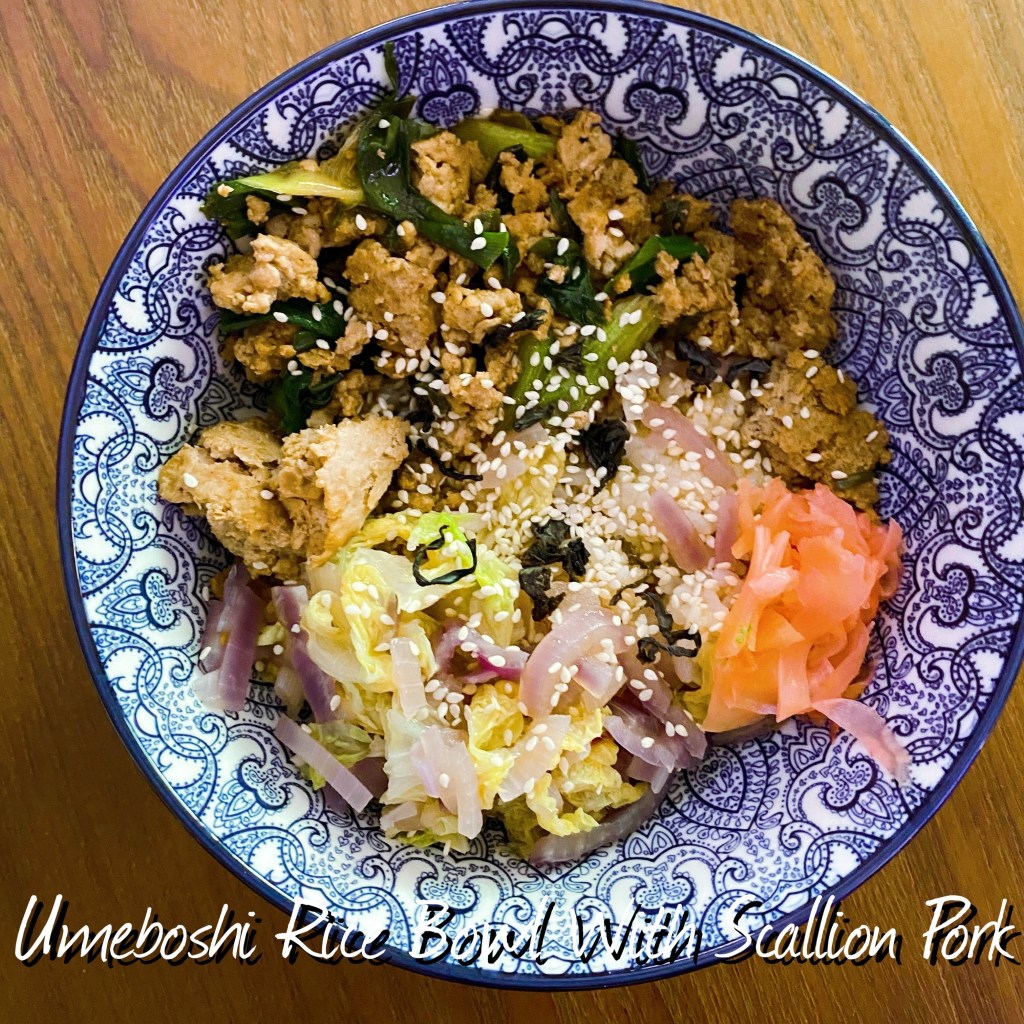
This is a really flavorful bowl built from mostly things that have been kicking around in my pantry for awhile. Yay for pantry reorganization and clean out!
gluten-free
Umeboshi Rice Bowl with Scallion Pork
1 cup sushi rice
2 tsp mirin
1.5 Tbsp sushi vinegar
1 Tbsp sesame oil + 2 tsp
1 onion, thinly sliced
Dashi broth granules
Napa cabbage, about 1.5 cups sliced into ribbons
3 large scallions, chopped on the bias
1 pound ground pork
2 tsp umeboshi paste
1 packet furikake sangho (or any rice seasoning blend)
Soy sauce
White pepper
Salt
Start the rice. Wash if you don’t want Japanese grannies the world over to tsk your memory, and add to the vessel you cook rice in. Add a double amount of water, 1 Tbsp sesame oil, 2 tsp mirin, 1.5 Tbsp sushi vinegar and a generous pinch salt. Cook how you cook rice – I put mine in the slow cooker and hit “rice”.
While that cooks, add the extra 2 tsp sesame oil to a hot pan. Add the pork and sautee, crumbling, until 3/4 done. Add the scallions, a sprinkling of soy sauce and white pepper. Brown and set aside.
Add the thinly sliced onion to a pan and just cover with water & a generous shake dashi granules. Simmer until soft and 3/4 of the liquid has evaporated. Add the cabbage and sautee until crisp-tender. Set aside.
When the rice is done, mix in the umeboshi paste and furikake.
To serve, add pork and cabbage to the rice. Top with sesame seeds, a little snipped nori if you have it, some chopped pickled ginger (delivery sushi FTW), and drizzles of mirin and sesame oil.
Makes enough to batch cook. Mine, sadly, only lasted 4 portions.
This week, I was really attracted to the Buddha bowl pics scattered throughout my Pinterest feed and didn’t want to make 9,000 ingredients – so I worked to combine a list (albeit a large list) of simple ingredients in a variety of ways to make the best of a simple mixture of quinoa + rice.
My week 100% could have been more cost-effective, but it gave me a good dose of the ingredients combining kind of Chopped Kitchen kind of life I’ve been missing.
Quinoa & Rice Base
3/4 c. quinoa (rinse if you’re not lazy like me)
3/4 c. sushi rice (rinse if you aren’t lazy like me)
2 Tbsp. mushroom-based umami powder
1 Tbsp. vinegar (I usually use rice vinegar but only had black vinegar on hand)
1 Tbsp. sesame oil
Big sprinkle salt
3c. water
Combine all and set your rice cooker to cook. Alternately, sushi rice & quinoa both take about 25 minutes to cook on the stove.
Now for the mix-ins to transform this simple added-protein base into a few different dishes.
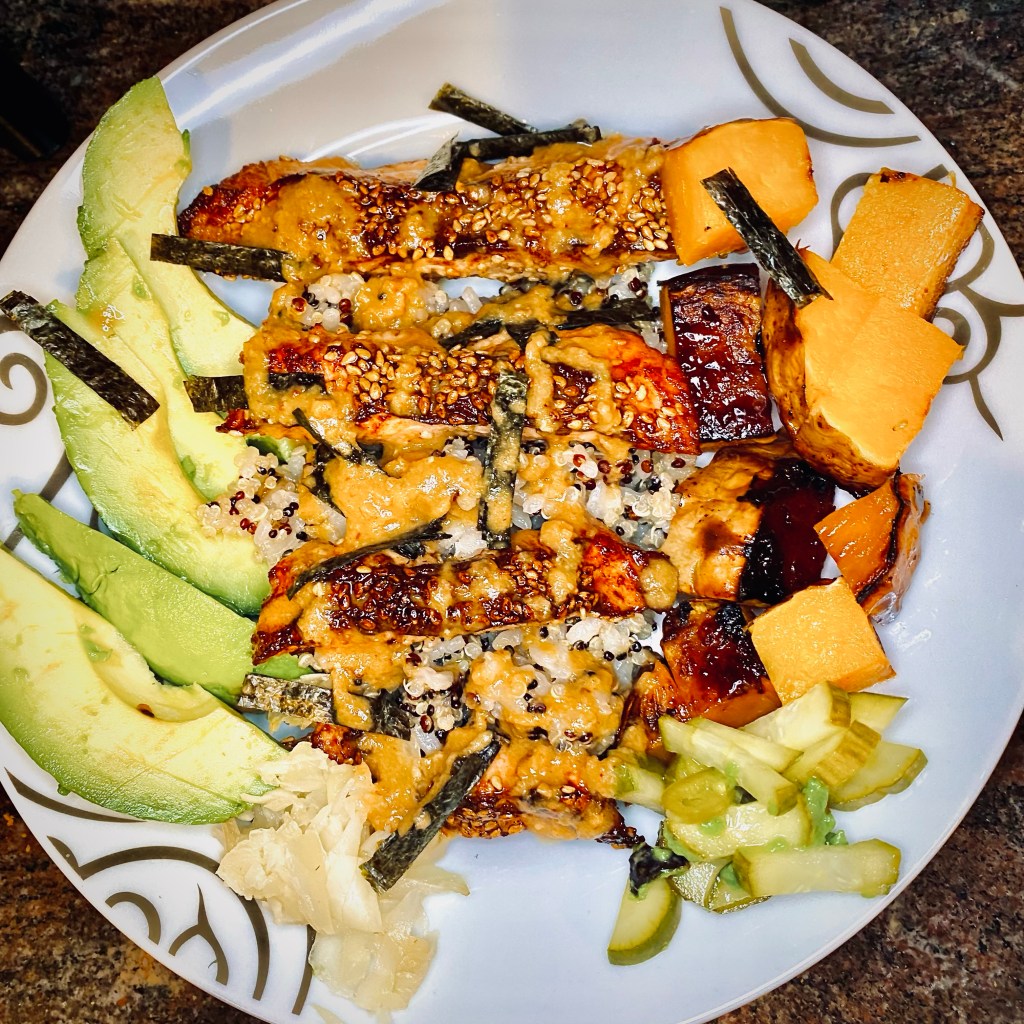
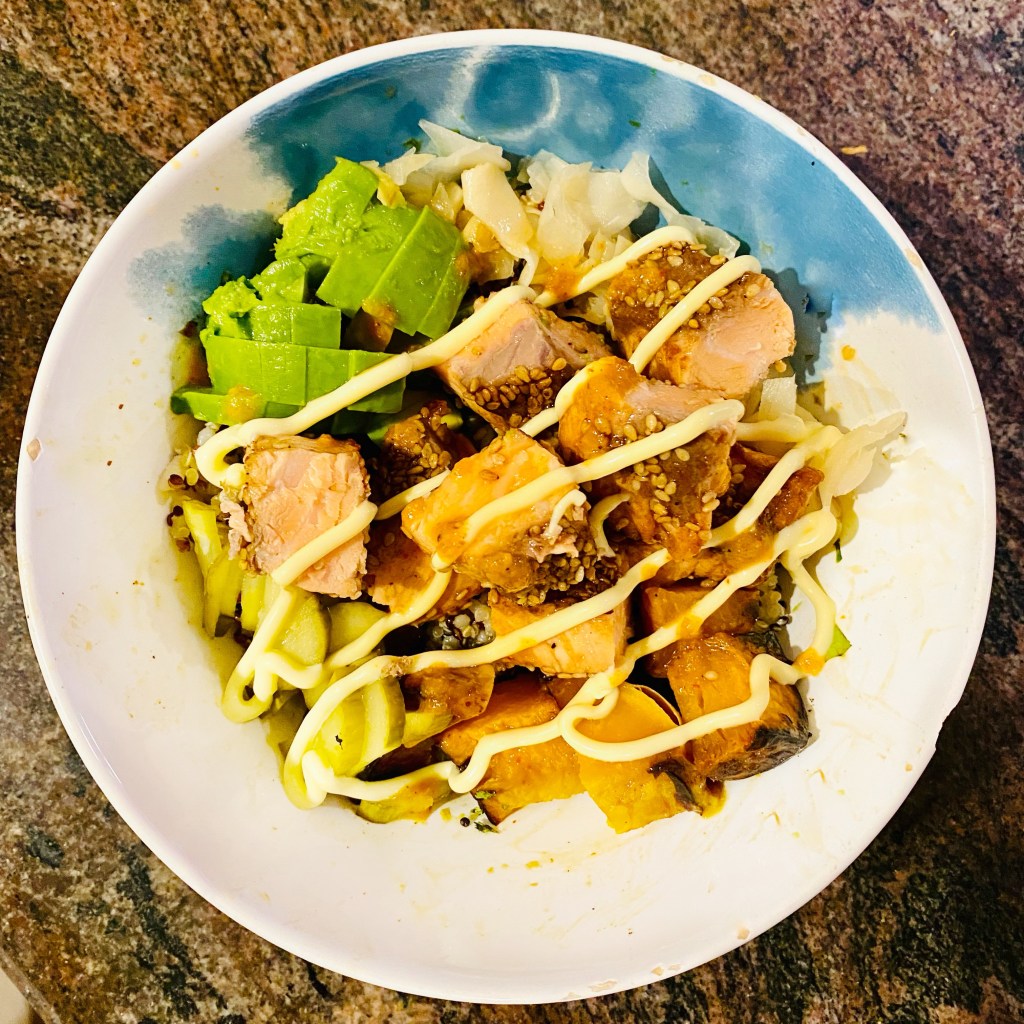
Day 1: Sesame Crusted Salmon Bowl
Sesame crusted salmon (take 1 salmon steak, skin and de-bone. Pat dry. Brush with a little soy sauce and sprinkle liberally with sesame seeds. Press the sesame seeds into the fish to adhere. Shallow fry over medium-high in a pan until cooked to your desired doneness. Drain on paper towels until ready to use.)
Quinoa + sushi rice base (see recipe above)
Avocado, sliced or cubed
Lemon sesame pickled cucumbers , diced
Pickled ginger, minced
Nori
Roasted butternut squash (Mix 1 Tbsp. soy sauce, 1 Tbsp. sesame oil, 1/2 tsp. date molasses & 1/2 tsp. white miso into a sauce – drizzle over a halved and seeded butternut squash and bake @ 400F for 25 mins or until soft and browned)
Sauce
1 Tbsp. peanut butter (tahini would also be great)
1 tsp. white miso
1 Tbsp. soy sauce
2 tsp. Bulldog sauce (or Worcestershire)
2 tsp. black vinegar (or sushi vinegar)
1 Tbsp. water
1 tsp. your favorite hot sauce (I used a habanero mix)
To make your bowl, assemble about half a cup of the quinoa mix and later the desired amount of the rest of the ingredients. Drizzle sauce over top and sprinkle with thinly sliced nori. Dust with more sesame if desired.
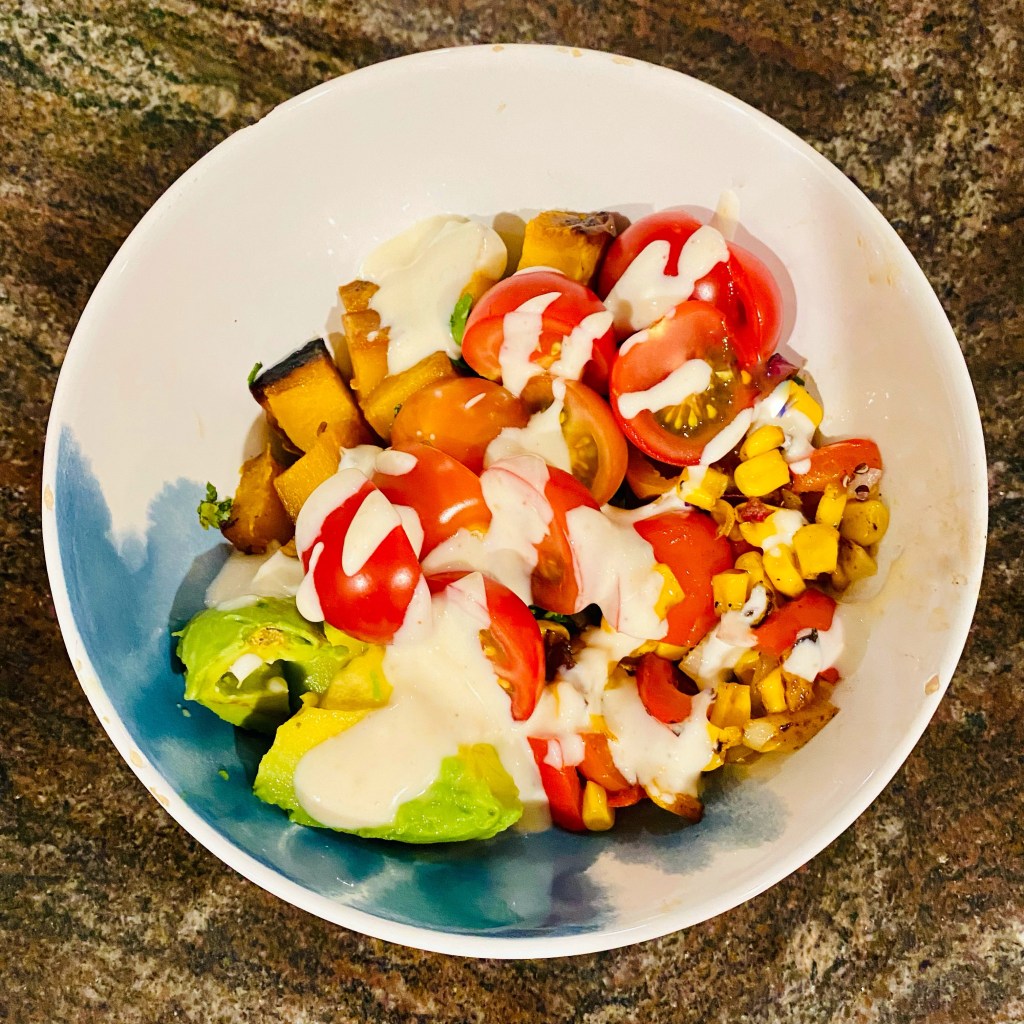
Day 2: Spicy Fiesta(ish) Bowl
1/2 c. frozen corn
1 bell pepper, chopped
1/4 red onion, chopped
1 clove garlic, minced
Sauté the above in olive oil; season with salt, pepper & Tony’s Creole seasoning or your favorite spicy mix
Bowl Base
1/2 c. quinoa
1 hand full cilantro, chopped
1 Tbsp. water
1 Tbsp. lime juice
Add the water to the quinoa and zap to warm. Stir in the cilantro and lime juice.
Sauce
2 Tbsp. your favorite plain yogurt (mine is a plain coconut milk)
2 tsp. – 1 Tbsp. your favorite hot sauce (mine is a habanero garlic mix)
Stir to combine.
Toppers
Avocado
Butternut squash leftover from the first bowl
To make your bowl, assemble about half a cup of the quinoa mix and later the desired amount of the rest of the ingredients. Drizzle sauce over top and top with avocado & squash.
Day 3: Spiced Chickpea Veggie Bowl
1.5 c. chopped kale
1/2 small red onion, diced
1 bell pepper, chopped
1 lg. zucchini, diced
1 Tbsp. oil
Salt & pepper
Sauce
1/4 c. yogurt
1 Tbsp. almond butter
1 tsp. turmeric
1 tsp. sumac
2 tsp. lemon juice
Leftover Bowl Components
Butternut squash
Quinoa rice mix
Topper
Avocado
Roasted chickpeas (I usually buy mine and have an Indian spiced variety that’s amazing)
To make your bowl, assemble about half a cup of the quinoa mix and later the desired amount of the rest of the ingredients. Drizzle sauce over top and add avocado & chickpeas.
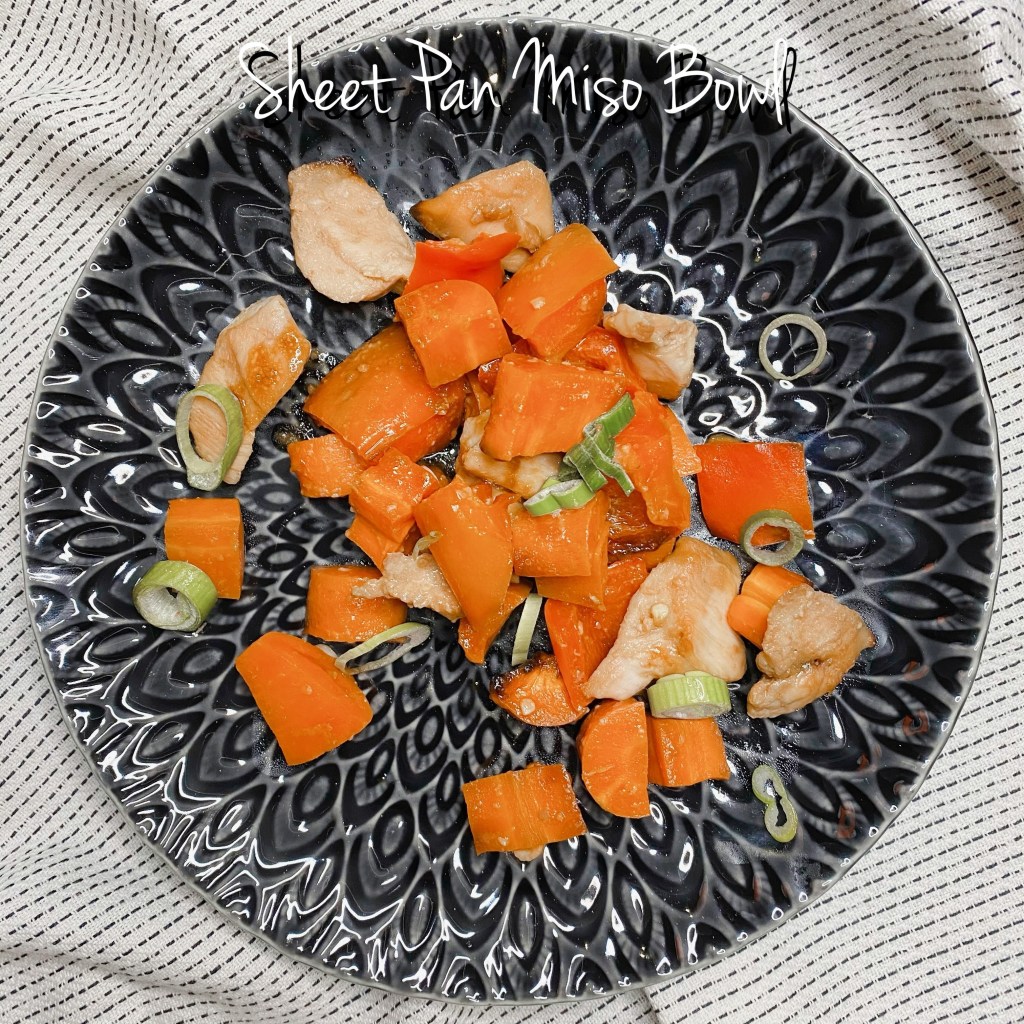
This is a simple and quick sheet pan dinner with a nice, light taste for nights when you *want* some super unhealthy Japanese takeout, but don’t want a bunch of grease – or to wait for delivery.
gluten-free
Sheet Pan Miso Bowl
1.5 Tbsp. miso
1.5 Tbsp. brown sugar
1.5 Tbsp. date molasses (or a smaller amount of honey or other sugar)
3 Tbsp. soy sauce, tamari or coconut aminos
3 Tbsp. sesame oil
1 bell pepper
2 – 3 carrots
2 – 3 chicken breasts or other protein
Preheat your oven to 200C/375F and prepare a baking sheet.
Combine all the wet ingredients together, mashing the miso with the back of a spoon to break it up better. Set aside.
Chop the chicken, carrots and pepper into bite-sized pieces, placing all onto the prepared baking sheet.
Pour 2/3 of the sauce over top and toss well to combine.
Spread the chicken & veggies out in a single layer over the baking sheet. Bake 20 minutes or until cooked through.
Take the last third of the sauce, zap it in the microwave about 20 seconds to ensure the sugar is melted. Add a Tablespoon of water to thin the sauce a bit. Stir well to combine and toss with the cooked chicken & veggies before serving.
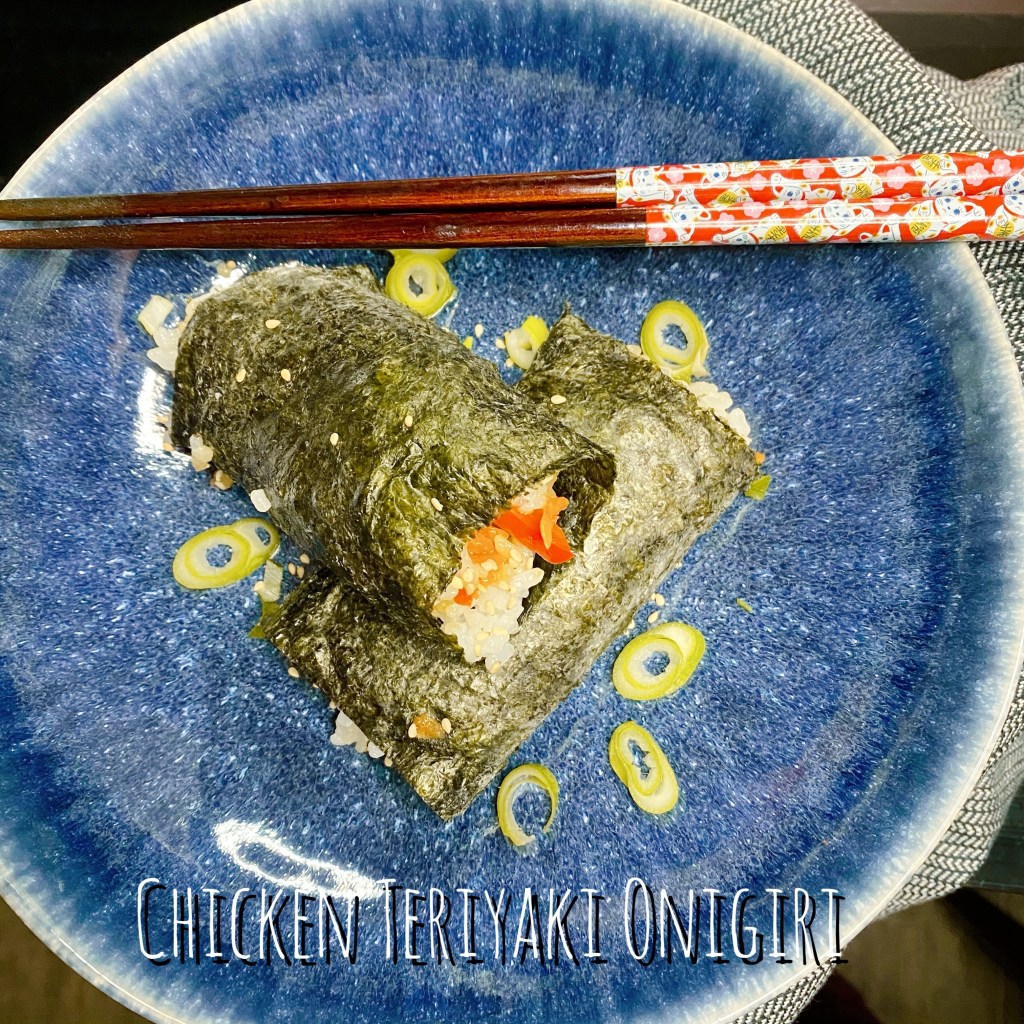
This recipe was inspired by a Tasty video for crispy onigiri that popped up on my Facebook feed, and turned out really well, though it’s not *technically* teriyaki sauce, since it doesn’t include mirin. Mirin isn’t available where I live, and this recipe makes a great halal alternative.
gluten-free
Chicken Teriyaki Onigiri
1 package boneless skinless chicken breasts
1.5 Tbsp. cornstarch or arrowroot powder
1/4 c. soy sauce
2 Tbsp. brown sugar
1 Tbsp. grated fresh ginger
2 cloves grated garlic
1 Tbsp. honey
1 tsp. sesame oil
1 Tbsp. sushi vinegar (I used this as a replacement for mirin)
1 medium carrot, grated
1 bell pepper, thinly sliced and then chopped fairly small
Neutral oil, salt & pepper
Sushi rice
Nori sheets
Green onion (optional)
Sesame seeds (optional)
1 Tbsp. mayo
2 Tbsp. soy sauce
Mix the cornstarch with enough water to form a slurry. Add the soy sauce, brown sugar, ginger, garlic, honey, sesame oil and sushi vinegar. Stir to combine.
Chop the chicken into small chunks and add half the marinade. Marinate for :30 – 1 hour.
While the chicken is marinating, cook your rice (I make mine simply with 1c. sushi rice + 1 Tbsp. sesame oil + 1 Tbsp. rice vinegar, a big pinch salt + 2c. water cooked on the rice setting of my electronic cooker).
When your rice is done, remove to a bowl to cool a bit.
Reduce the other half of the marinade until thickened over low heat and set aside.
Grate the carrot and chop the pepper thinly. Set aside.
Thinly slice the green pepper and set aside.
Mix the mayo and remaining 2 Tbsp. soy sauce in a small dish and set aside.
Add 1 Tbsp. neutral oil to a medium pan over medium heat. Add the chicken and sauté, moving frequently so the sugar in the sauce doesn’t burn, until cooked through. Sprinkle with a little salt and a generous amount of white pepper (or less – or black pepper – you do you).
Set the chicken aside. Add 1 Tbsp. neutral oil to the pan and put back over the heat.
Add the carrot and pepper and sauté until soft. Add 1 Tbsp. of the reserved and reduced marinade. Stir to combine and let cook another minute or two. Set aside.
You’re ready to assemble your onigiri, and this process goes pretty quick.
I made myself an assembly line – a little dish of water to coat my hands in so the rice doesn’t stick, rice, the dish of soy sauce mayo, chicken, veggies, sliced green onions, sesame seeds, and nigiri sheets that have been cut in half.
To assemble: dip your hands in the water, grab a small hand full of rice, and press into a flat (ideally triangular shape but I couldn’t make that happen) shape. Make a small dent in the middle of the rice. Spread some of the flavored mayo all the way to the edges of the rice. Add a couple chunks of chicken (I used 3), about a Tablespoon of veggies, and a couple slices green onions. Fold your fingers up, turning your hand and the rice into kind of a cup. With your other hand, push the chicken into that cup as you continue folding your fingers up, enclosing the chicken and veggies into a rice case. Sprinkle with sesame seeds and lay on one of the halved nori sheets. Roll up into a burrito looking roll, wetting one end of the nori to seal everything together.
I know this sounds really awkward, but you’re basically doing what you would do to stuff a burger with cheese, if that makes sense. I went gentle and slow and didn’t worry too much about overstuffing each ball. Needless to say, I had a bunch of leftover chicken; enough for dinner for two + lunch the next day.
It seems our Lockdown staple of ramen noodles isn’t going anywhere any time soon. DH and I are both still craving comfort, and I’m still on the war path when it comes to wasting ingredients and clearing the pantry – so we are having some mish-mashed meals as of late.
Which is all fine, provided I can continue to find ways to add at least a little nutritional value to dinner. Some sort of vegetable.
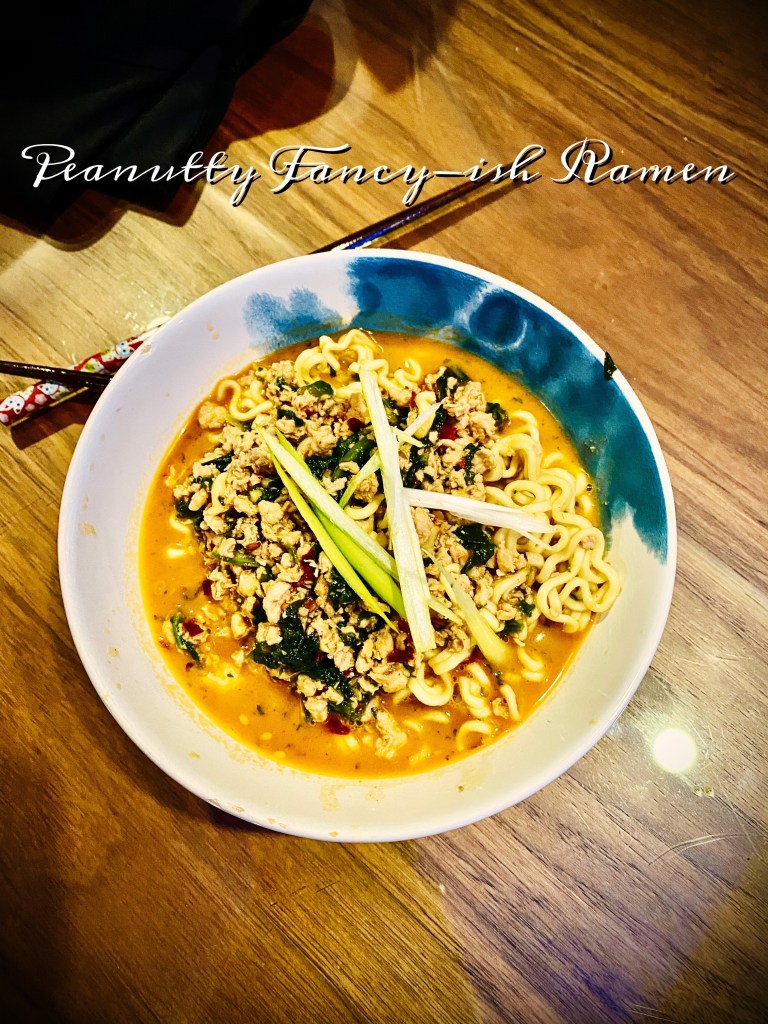
This dish elevates some pantry staples admirably, adding two sources of protein (if you add meat), and a veggie that can also serve as a freezer cleaner.
A note on ramen: I used pot noodles (aka cup o’ noodles) for this recipe. We are loving the Korean brand Budok lately – the base flavoring I went with was chicken cheese, but this would be great with pretty much any base flavor. Mushroom, chicken, chili chicken, shrimp, curry – all would be delicious.
vegetarian and vegan if you don’t add meat, gluten-free with substitutions
Peanutty Fancy-Ish Ramen
1 pot instant ramen per person (any flavor will do, or sub rice noodles for gluten free – a little chicken or veggie bouillon would add some nice flavor if you are not using the flavor packet that comes with the noodles)
2 Tbsp. peanut butter (I used a low sugar variety)
1/4 c. soy sauce, tamari or coconut aminos
1 Tbsp. sambal olek (chili garlic sauce)
2 tsp. sesame oil
1 tsp. honey (sub agave for vegan)
2 small scallions, sliced thinly
Frozen spinach
Optional: leftover ground chicken or beef, soft boiled egg, fish cakes, leftover fried tofu, or other additional protein source
Sesame seeds for garnish
Combine the peanut butter, soy sauce, sambal, sesame oil and honey in a small pot over low heat. Simmer, stirring, until well combined and beginning to thicken. If your heat is too high and this mixture dries out too much like mine did, add a Tablespoon or two of water, stir quickly to combine, and move off the heat for a second or so to cool down a bit.
While the sauce is working, add frozen spinach to the noodle pots and fill with boiling water. Let sit 3 minutes and drain.
Add the noodles to the pot with the sauce, along with scallions, any additional protein sources, and the seasoning packet. Stir well to combine and garnish with sesame seeds.
This recipe as written, I realize, may not be accessible to anyone who does not share my love of grabbing interesting looking ingredients from the Asian aisle and chucking them in whatever looks good.
If you’re still curious to see what this tastes like and don’t share that predilection, an approximation can most likely be made by combining lemon juice, a hint of pomegranate molasses and a hint of rotel green chilis.
I served this plain for dinner (DH added rotisserie chicken to his), and with chili tuna for lunch the next day. Both plain and with some added tuna were good; if you want a little more nutrition with your dinner, broccoli would be great here. Maybe a bit of sesame seed for a little more fat.
gluten-free, paleo, vegetarian, vegan
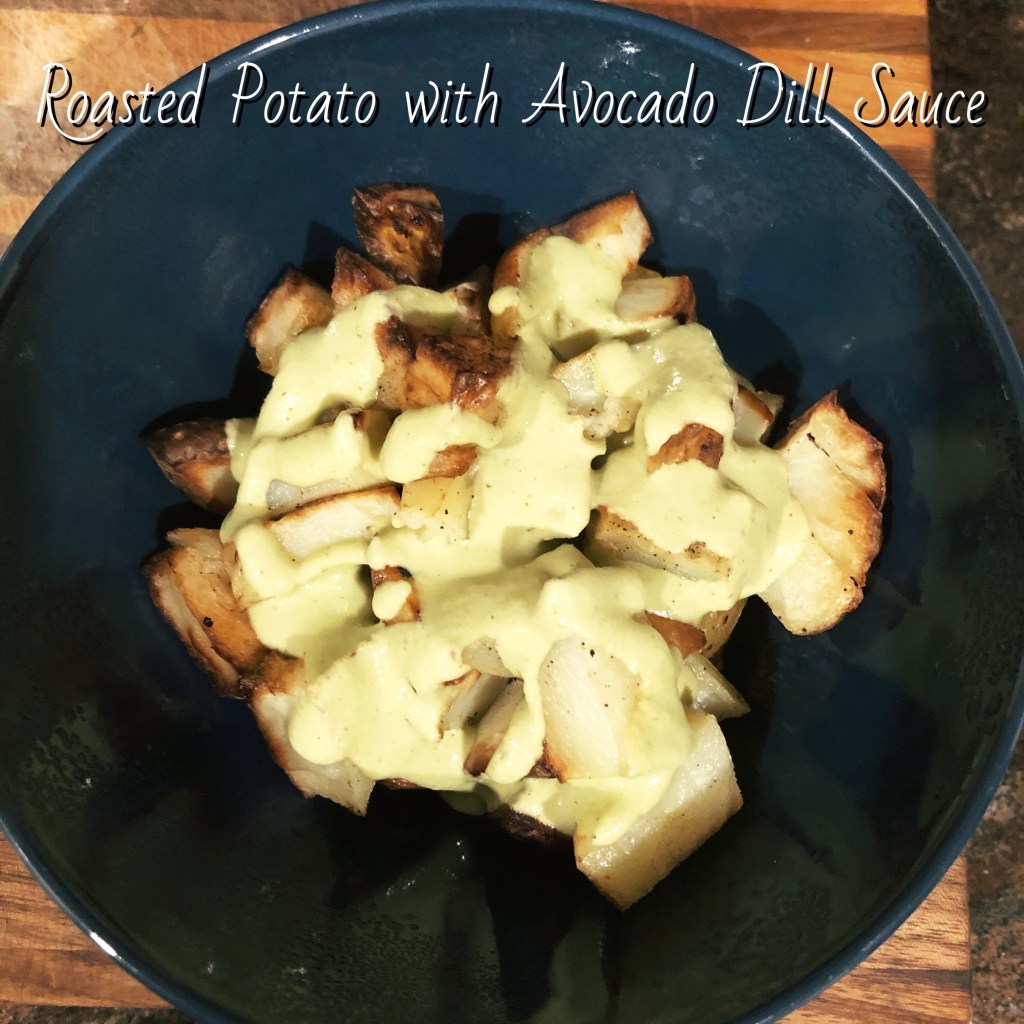
Roasted Potatoes with Avocado Dill Sauce
Sauce:
1 stalk celery
1 Tbsp. Japanese Yuzu jalapeño sauce
1 Tbsp. Kewpie Yuzu no-oil dressing
Juice of 1/2 a lemon
2-3 Tbsp. tahini
2 Tbsp. nutritional yeast
1 Tbsp. apple cider vinegar
1-2 Tbsp. water
1 Tbsp. garlic powder
1 clove garlic
1 Tbsp. oil of choice
Neutrally seasoned roasted potatoes (I roasted mine in a combo of garlic oil, salt and pepper until browned in a 220C oven ~35 mins)
Chop celery and garlic and add to a blender along with the rest of the sauce ingredients. Whiz. Taste for salt and acid, adding more if necessary. Add a little more water if it’s too thick for your liking. Mine was fine, but your mileage may vary.
Sauce serves 4 – 5; potatoes can adjust to accommodate that number or more
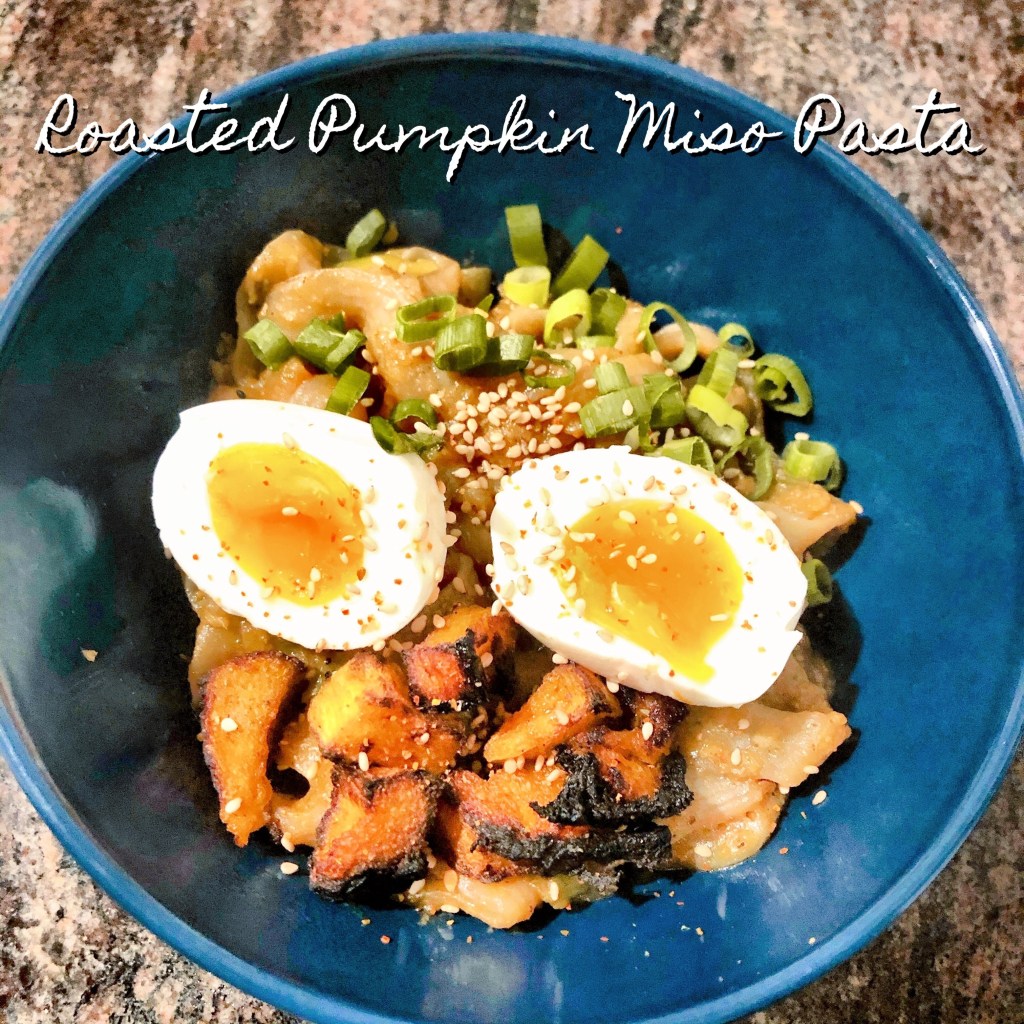
This lower-than-it-could be in carbs dish started life as the baby of a Japanese curry recipe and a ramen recipe and snowballed into a straight-up yummy pasta dish. I’m super bummed I only made enough to serve two; this was fantastic.
gluten-free, paleo, vegetarian, vegan
Roasted Pumpkin Miso Pasta
About a cup chopped pumpkin or butternut squash
2 tsp. white miso paste
Veggie or chicken stock
1/2 tsp. red chili flakes
Olive oil
1 Tbsp. + sesame oil
Curry powder
1 inch peeled fresh ginger, minced
2 scallions, minced
Sesame seeds
Soft egg (optional)
Togarishi (optional)
Kontjac noodles or sushi rice or ramen or udon or zoodles – all would be awesome, though I’ve only tried wide kontjac and rice
Preheat your oven to 200C/375F. Peel and chop the pumpkin into smallish pieces. Add to a prepared baking sheet, lash with oil, and sprinkle liberally with salt, pepper and curry powder. Toss. Bake about 40 minutes or until browned in spots and soft.
Let cool for a beat, and then add to a blender with the miso, red chili flakes, 2 tsp. oil, 1 Tbsp. curry powder, 1 Tbsp. sesame oil, and 1/2 a cup of stock. Blitz, adding more stock if needed to get smooth. I used about a cup in this stage.
In a saucepan or tall-ish sided skillet, add the minced ginger and the white + light green parts of the scallions with 2 tsp. garlic oil. Sauté until the onion is beginning to soften.
Add the blitzed pumpkin and another half cup or so of stock. Let simmer down to the consistency of a thick soup.
Add your drained and rinsed kontjac or whatever curry vehicle you’re feeling, toss, and let simmer a few minutes to combine.
Serve with an optional soft egg, the green parts of the scallions, a little drizzle of sesame oil, a sprinkle of sesame seeds, and some togarishi if you want another hit of spice.
As you can see from my last post (see pantry clearing post #1), my pantry is all over the map – but the bulk of the ingredients center on Southeast Asia, specifically Japan.
Japanese is a cuisine my DH and I both love and both crave when we either need a little comfort (among other cuisines, tbh) but feel like we need to be a little nice to our bodies and digestive systems.
This dinner is quick, easy, and feels like a healthy hug. If raw egg yolk freaks you out, omit.
Gluten-free
Chili Tuna Rice
1 cup premade sushi rice (1/2 cup short grain rice cooked in 2 cups water + 1 Tbsp. rice vinegar, 1 Tbsp. sesame oil, and a few grinds salt)
1/2 can chili spiced tuna, drained
2 Tbsp. dried wakame
1 tsp. powder-style chicken bouillon
1/2 cup hot water
1 egg
1/2 tsp. ginger garlic paste
1 Tbsp. coconut aminos
1 tsp. butter
Generous sprinkle toasted sesame seeds
1 green onion, thinly sliced
Set the sushi rice on to cook however you cook rice. While the rice is cooking, boil the 1/2 cup water.
Add the wakame and chicken bouillon to a small bowl and add the boiling water over top. Stir to combine and let sit until the seaweed is reconstituted. Drain loosely when you’re ready to serve and add back into the bowl.
Add the butter, rice, coconut aminos, ginger garlic paste, tuna, and egg yolk. Stir well to combine.
Top with the sesame seeds and green onions and serve.
This is a great little choose-your-own-adventure dinner that’s perfect for batch cooking – or a party.
Gluten-free, vegetarian, vegan
Crispy Miso Tofu Bowl
1 block extra firm tofu
1/2 tsp. black pepper
1 Tbsp. cornstarch or arrowroot powder
2 tsp. honey or agave
2 tsp. date molasses
2 Tbsp. sriracha
3 Tbsp. coconut aminos or soy sauce
2 tsp. white miso
3-4 cloves garlic, minced
1 inch fresh ginger, minced
3-4 big handfuls baby spinach
2 c. sautéed green beans, chopped
1 green onion, sliced into thin rounds
1 Tbsp. pickled ginger, minced
Nori, snipped into small strips
Furikake
Toasted sesame seeds
Togarishi spice or red pepper flakes
Sushi rice (short grain rice cooked with 1 Tbsp. rice vinegar, 1 Tbsp. sesame oil and salt)
First, place paper towels or a tea towel over your tofu and press with a plate or something heavy about 30 minutes to remove all the water.
Prepare your oven to 200C/375F. Line a baking sheet with paper or a silicone pad.
Make a sauce by whisking the sweetener, molasses, soy, sriracha and miso.
Slice the tofu into small squares, and fold 2 Tbsp. sauce into the tofu carefully – making sure not to break the squares up. Dust with pepper & cornstarch and toss.
Dump out into the prepared baking sheet in a single layer.
Bake 10 mins, flip, and bake an additional 10 to crisp.
Sautée the spinach with the garlic and ginger and add the green beans to warm through. Add the rest of the sauce and toss to coat.
To assemble, place rice in a bowl, add the tofu and veggie mix. Top with furikake, nori, sesame seeds, togarishi, pickled ginger and green onion.
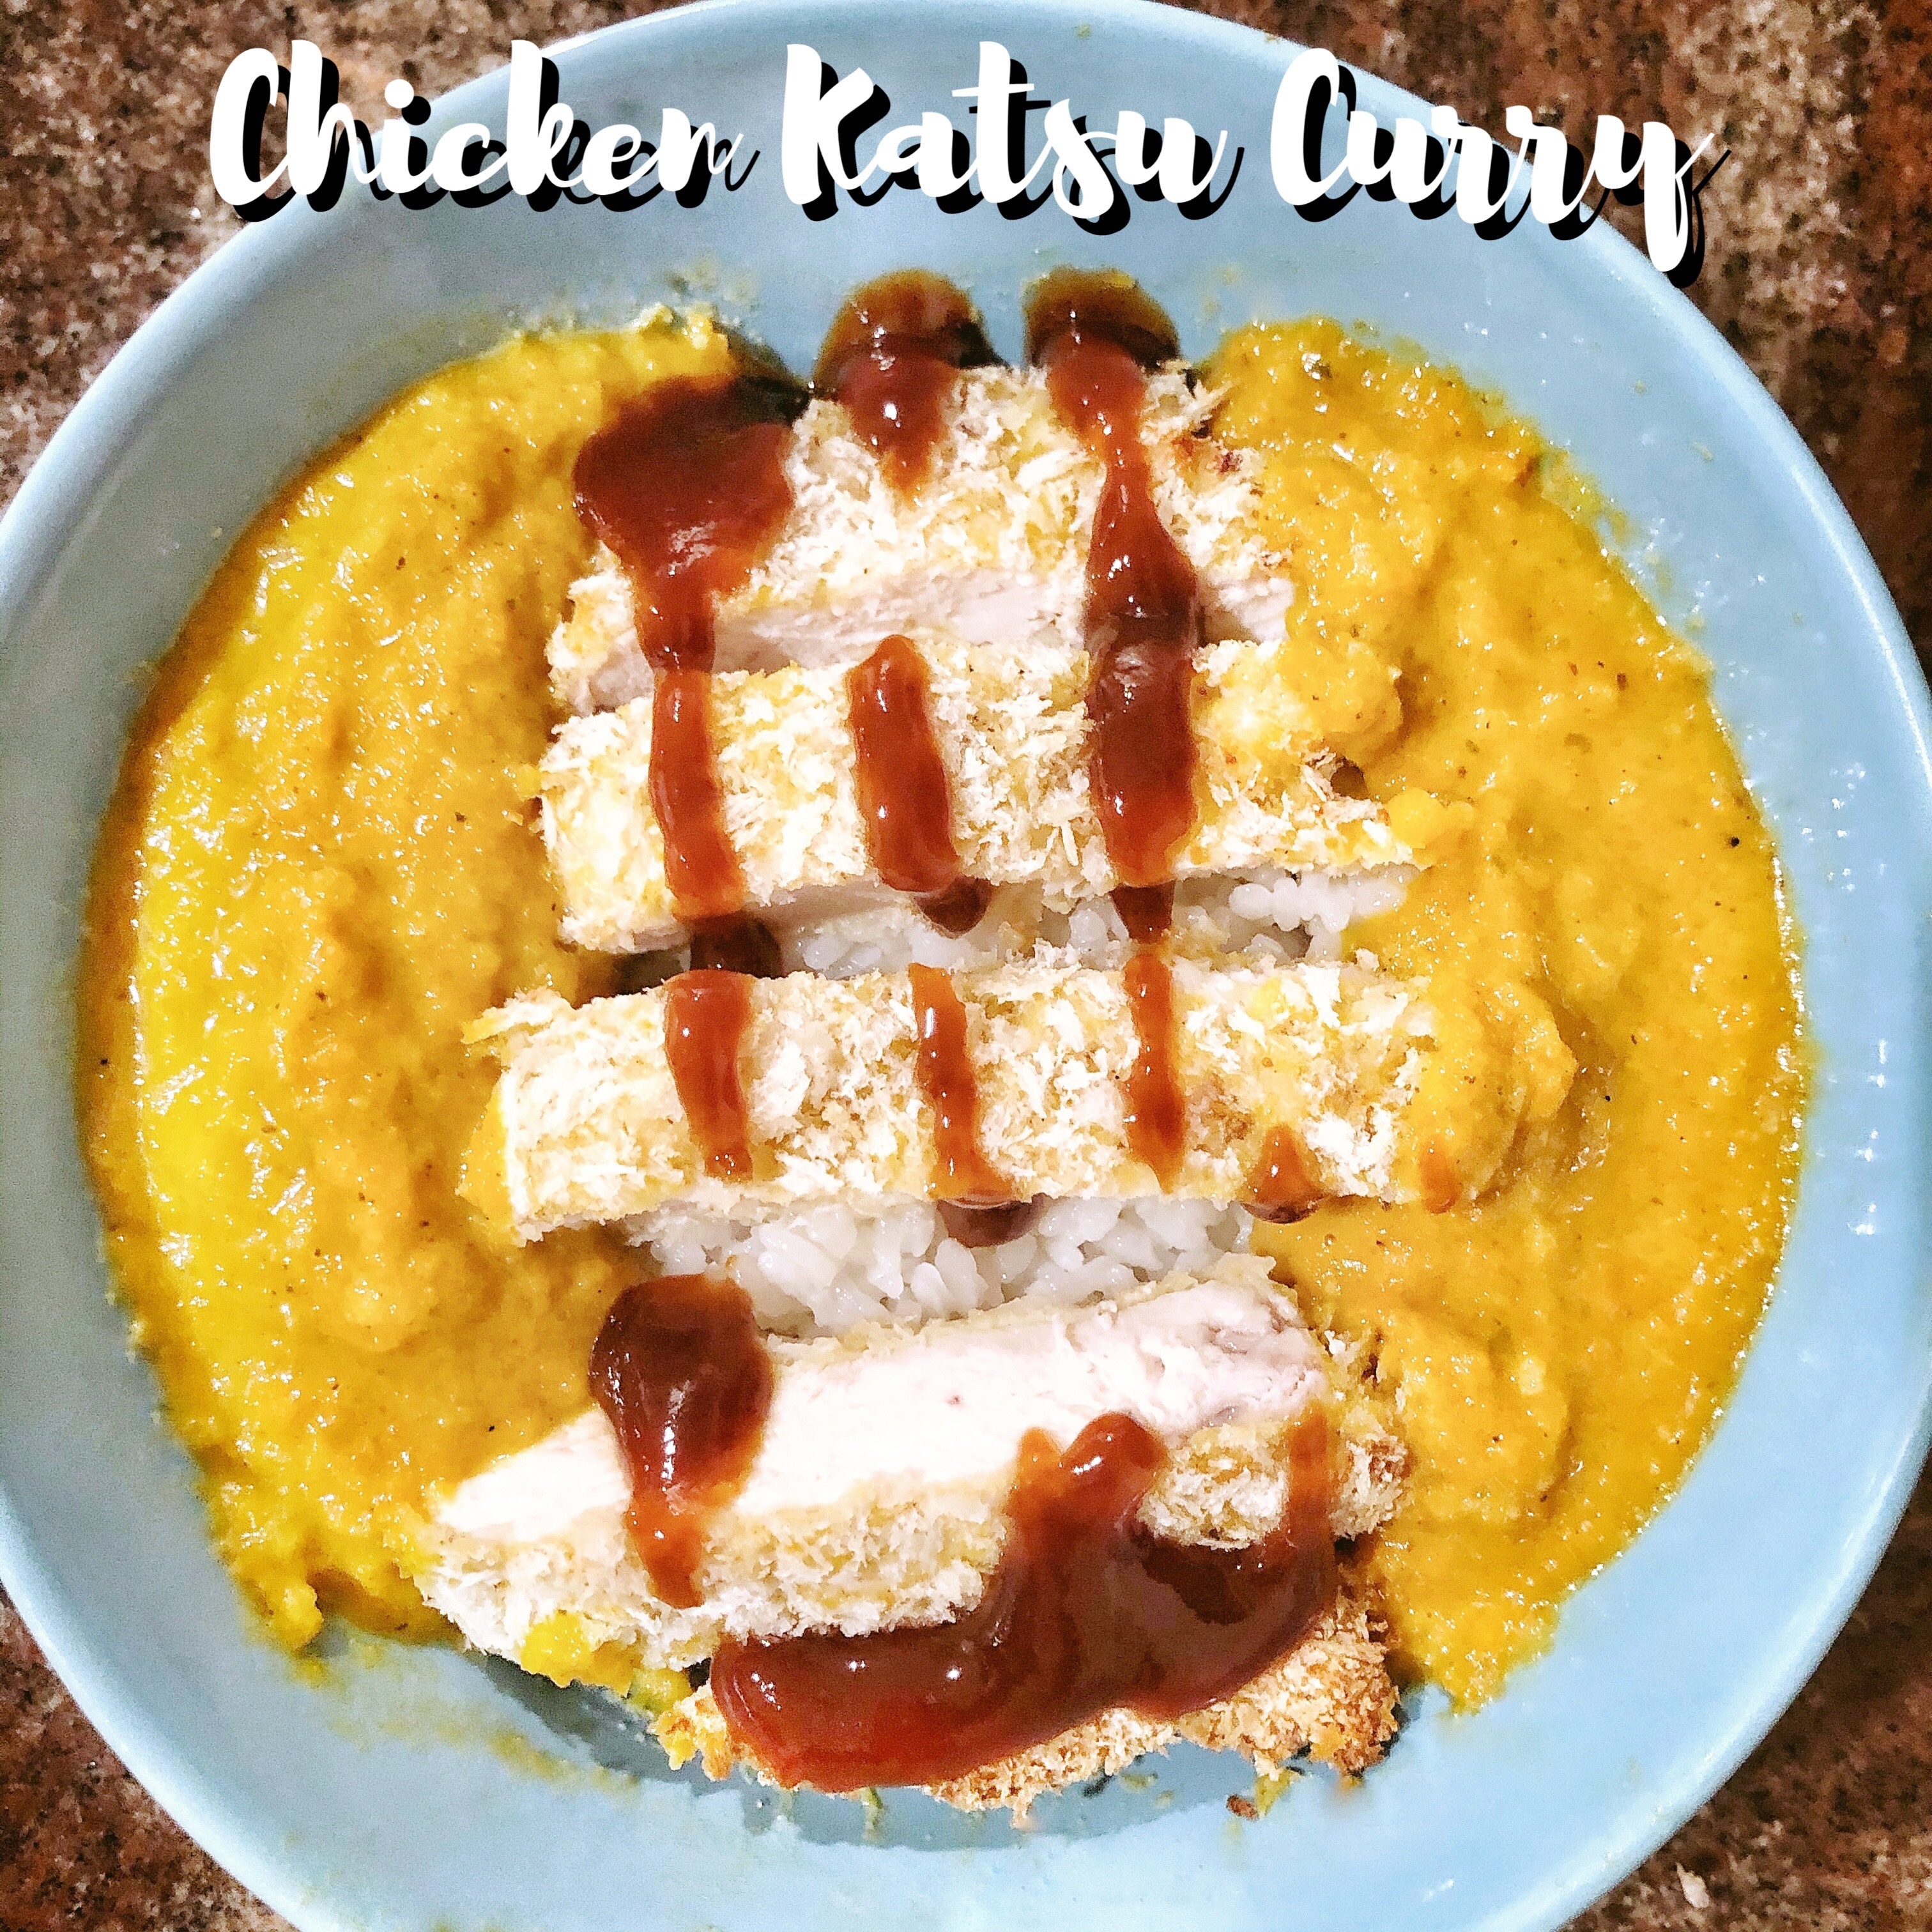
Ooh, this is a good one. Not *quite* like the katsu from my regular takeout spot, but not far off. Add a dash of pumpkin purée and some white pepper, and it’s there. Delicious.
Chicken Katsu Curry
Chicken Katsu
1 lb. boneless, skinless chicken breasts
40 grinds salt
Generous amount black pepper
1/4 cup flour
2 eggs
2 cups panko
Curry
1/4 cup neutral oil
1 yellow onion
1 medium carrot
1 inch ginger
4 cloves garlic
1 Tbsp. flour
2 Tbsp. curry powder
1 cup chicken broth
2 Tbsp. coconut aminos or soy sauce
1 Tbsp. honey
Katsu Sauce
1/4 cup ketchup
2 Tbsp. oyster sauce
2 Tbsp. Worcestershire sauce
1 Tbsp. honey
Preheat your oven to 375F/200C. Add a silicone liner or tinfoil to a baking tray and set aside.
Lay your chicken breasts in a single layer between 2 sheets of baking paper and pound to 1/2 inch thick.
Set up a breading station by placing shallow bowls or plates of flour seasoned with salt & pepper, beaten egg, and panko in a row. Coat the chicken with the flour mix, then dunk in the egg, and dredge in panko. Put on the prepared baking sheet and let stand 10 mins to rest.
Bake 10 mins, flip and bake an additional 10 mins.
While the chicken is cooking, chop the onion and carrot. Add the oil to a large pan and set over medium-high. When the oil comes up to temperature, add the onion and carrot and sautée, stirring frequently, until softened.
While that is working, chop the ginger and garlic. Add to the pan and sautée another few minutes.
Whisk in the flour and curry powder to combine.
Whisk in the chicken stock, soy sauce and honey.
Simmer, stirring frequently, 15 – 20 minutes or until reduced by about half.
Let cool and blend.
For the Katsu sauce, whisk together the ketchup, oyster sauce, Worcestershire sauce, and 1 Tbsp. honey.
Serve with a bowl of sushi rice. Makes enough for 4.